Foundation Game Design with ActionScript 3.0, Second Edition (20 page)
Read Foundation Game Design with ActionScript 3.0, Second Edition Online
Authors: Rex van der Spuy

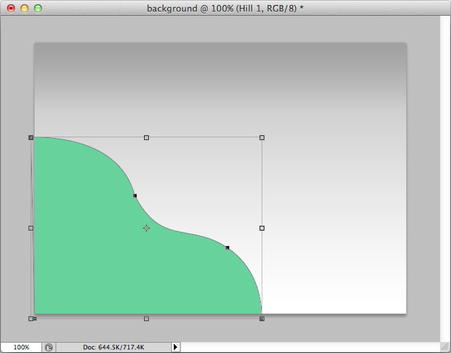
Figure 2-51.
Fill the path with the foreground color.
If necessary, you can reverse this effect by clicking the “Subtract from shape area (-)” button in the black arrow's Options bar. This will fill the surrounding area with color and keep the shape empty.
Your canvas should now look similar to
Figure 2-52
.

Figure 2-52.
The hill is now filled with color.
What actually happened here? The path you drew in the previous sections was just a stencil. What you've done now is poured color into that stencil. The color has been poured onto the transparent surface of the Layer. It's like using a stencil to color in a shape on a transparent sheet of plastic.
All you care about is the color you've just poured onto the layer. You can get rid of the path completely because it's served its purpose and you don't need to use it again. Let's delete it.
The path should still be selected with the black arrow tool. (You can confirm this by the bounding box that will be around the path.) If it isn't selected, click the path once with the black arrow. Press the Delete key on your keyboard and the path will disappear.
What you're left with is a nice green hill. In the next section you're going to make another copy of this hill, change its color, and reposition it on the right side of the canvas behind this first hill.
When you're comfortable working with the Pen Tool and its related tools and techniques, try using the Freeform Pen Tool. You'll like it; it works like a real pen! You can draw a shape freehand, and then use the Convert Point Tool and white arrow to fine-tune your shape.
You need two hills in your scene. But rather than going to all the trouble of making another hill, just duplicate the one you've already got and make a few changes to it.
With the Hill 1 layer selected in the Layers panel, select Layers Duplicate from the main menu. (You can also right-click on the Hill 1 layer and select Duplicate.) The Duplicate Layer dialog box will open and ask you for the name of the new Layer. Give it the name “Hill 2,” as shown in Figure 5-53. Click the OK button.

Figure 2-53.
Duplicate the layer.
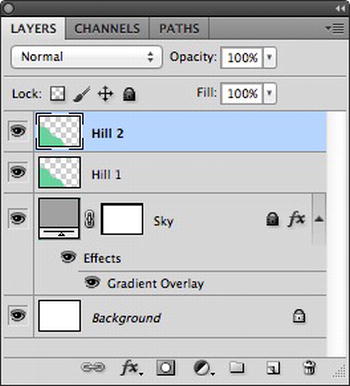
As soon as you do this, you'll see a new layer called Hill 2 appear above the Hill 1 layer (
Figure 2-54
). The layers look identical.

Figure 2-54.
The new layer is duplicated and is floating above the first one.
You now have two hills on the canvas, even though it just looks like you have one. That's because the new layer you just created is in exactly the same place as the first one. The new hill is sitting directly on top of the first hill. Move it out of the way so that you can see both hills
Select the Move Tool. In the Options bar, check Auto-Select and choose Layers from the option menu. The Auto-Select option allows the Move Tool to automatically select objects on the correct layers when you click on them, which is very convenient. If you don't change this setting, you'll have to first click the layer you want to work on in the Layers panel before you can move that layer around the canvas. While you're at it, make sure that Show Transform Controls is also selected.
Figure 2-55
shows what the Move Tool options should look like.

Figure 2-55.
Auto-selecting layers lets the Move Tool automatically select objects on the correct layer when you click on them.
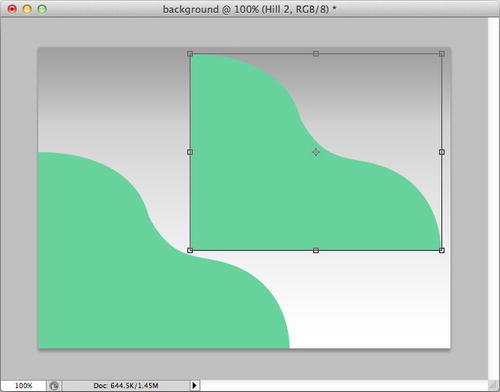
With the Move Tool still selected, move the hill on the canvas. Doing so will magically reveal the first hill on the layer below, as shown in
Figure 2-56
.

Figure 2-56.
Move the new duplicated hill to reveal the original on the layer below.
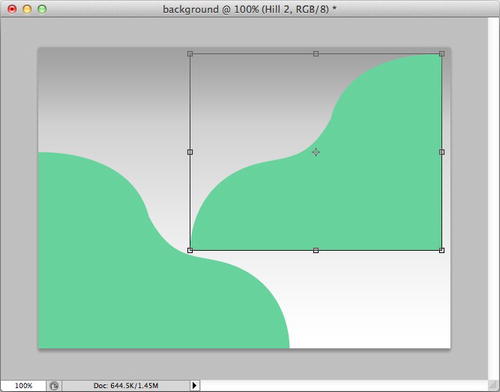
Flip it horizontally so it's facing the opposite direction to the first hill. Select Edit Transform
 Flip Horizontal from Photoshop's main menu. The hill will flip around to face the other way, as you can see in
Figure 2-57
.

Figure 2-57.
Flip the new hill horizontally.
Now let's change the new hill's color. Select a dark green color in the Foreground color box.
Select the Paint Bucket Tool. Click inside the new hill, and it will be filled with the new color (
Figure 2-58
).

