Foundation Game Design with ActionScript 3.0, Second Edition (15 page)
Read Foundation Game Design with ActionScript 3.0, Second Edition Online
Authors: Rex van der Spuy

Figure 2-13.
Choose a color in the Color Picker.
Instead of using the Color Picker you can also choose a color from the Color or Swatches panel on the right side of the workspace. Click on the Swatches tab and little squares of colors (called swatches) appear that you can select. When you move your mouse over a swatch, the mouse pointer arrow turns into an eyedropper, which is a cute way of telling you that you can slurp up a bit of color to use in your drawing. When you select a color with the eyedropper, it appears in the New box of the Color Picker window.
Figure 2-14
illustrates this.

Figure 2-14.
Optionally select a color from the Swatches panel.
You can also click on a color swatch directly without having to open the Color Picker. The color will be directly applied to the rectangle or any other shape you're working with.
The swatches that you see in the Swatches panel by default are a good selection of colors to start with, but there are many more. Click the small button to the extreme right of the panel that looks like a list with a downward pointing arrow next to it. This will open a list of color collections you can choose from. Find a collection you like. You can return to the original swatch collection by choosing Reset Swatches from this same list.
You're going to be drawing a sky background, so select a bright blue color. Click the OK button in the Color Picker window when you're done. The new color you've chosen will become visible in the Foreground color box at the bottom of the Tools panel.
Return to the blank canvas. Hold the left mouse button down over it and drag to draw a square or rectangle shape, as shown in
Figure 2-15
. It should be the same as the color you selected in the previous steps.
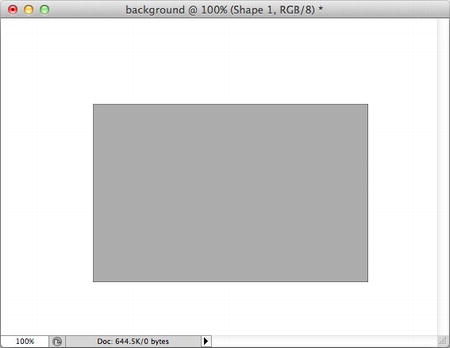
Figure 2-15.
Draw a rectangle in the new workspace.
This isn't bad, but you really want the blue rectangle to fill the whole screen. Let's fix this in the next step.
Select the Move tool at the top of the Tools panel. The Move tool lets you move objects around the canvas and resize or rotate them. As soon as you select it, the Options bar gives you some options you should change. One of these is extremely important: a checkbox called Show Transform Controls.
Make sure that the Show Transform Controls is selected with a checkmark. Without this option selected, you won't be able to easily resize or rotate objects.
Figure 2-16
shows what the Move Tool button and the Options bar should look like.
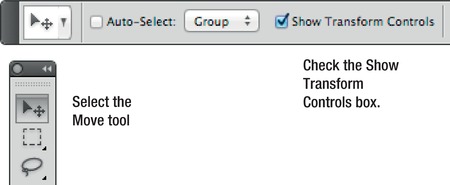
Figure 2-16.
Select the Move Tool and make sure that the Show Transform Controls checkbox is selected in the Options bar.
As soon as you select the Move Tool with Show Transform Controls, you'll notice that small squares appear on the corners, sides, and middle of the rectangle you drew. These are called
drag handles
. While the Move Tool is selected, you can drag these handles with the mouse to resize and rotate the rectangle.
When you move the mouse over one of these handles, you'll see one of two icons appear. Diagonally pointing arrows mean that you can resize the rectangle (this is also called
scaling
it). A curved arrow means that you can rotate it.
Figure 2-17
illustrates how you can use these drag handles to change the size or orientation of the rectangle.

Figure 2-17.
Use the Move Tool to resize or rotate an object.
Changing the size and orientation of a drawing object like this is called
transforming
it in Photoshop's terminology. You can choose more transform options by selecting Edit Transform Path or EditTransform from Photoshop's main menu. The options you'll find there are Scale (resize), Rotate, Skew, Distort, Perspective, and Warp. You'll also find options to flip and rotate an object by fixed amounts.
Use the Move Tool and drag handles to resize the rectangle so that it fills the whole canvas, as in
Figure 2-18
. The canvas should now be completely blue.
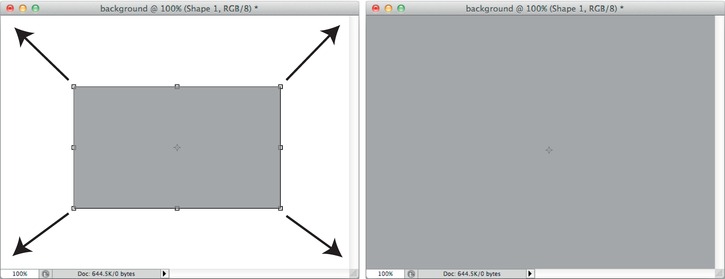
Figure 2-18.
Resize the rectangle so that it fills the whole canvas.
When you've finished resizing, press the Enter key. This applies the transformation, and you need to do this before many of Photoshop's options become active again. You can also apply the transformation by selecting the Move tool again. Photoshop will open a dialog box asking whether you wish to apply the transformation. Click OK to accept it.
While you're resizing or rotating a shape or selection, Photoshop disables most of the options from its main menu and also many of the buttons in the panels on the right. If you ever find yourself struggling with apparently frozen buttons or inexplicably dimmed-out menu options, you probably forgot to apply the transformation on the shape you were working on. Press Enter to apply it immediately, or select the Move tool to open a confirmation window. Everything will work fine after that!
You now have a blue background that will be the basis of your sky. It could be fine as it is, but let's make it better by adding a gradient to give it a sense of depth.
A
gradient
is a color that gradually changes, either from light to dark or from one color to another. In this next step you'll add a gradient to the rectangle so that it's dark blue near the top and light blue near the bottom. This will create the illusion of the sky disappearing into the horizon.
When you work with Photoshop's shapes, like circles and rectangles, you apply gradients to them with the Layer Style menu. Select LayerLayer StylesGradient Overlay (
Figure 2-19
).