The Art of Pregnancy Photography (15 page)
Read The Art of Pregnancy Photography Online
Authors: Jennifer George
Tags: #Health & Fitness, #Pregnancy & Childbirth, #Photography, #Subjects & Themes, #Portraits, #Techniques, #General

After slightly retouching the image with the Healing Brush, the Nik Midnight filter was applied.

A touching moment can be best represented by a simple black & white image. Once this image was converted to black & white, the Nik Midnight filter was added.
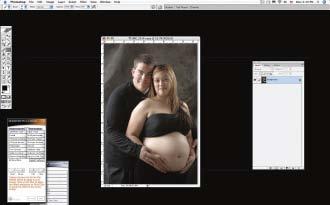
When starting to retouch an image, open your raw file and make adjustments to the color balance and exposure. Copy the corrected image, then continue to work on the copy.
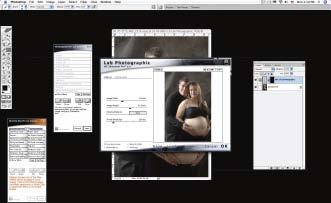
Most digital images will need sharpening. This image was sharpened in nik Sharpener Pro 2.0. Size and resolution settings were selected, and the file was prepared for lab output.
In the sections that follow, we’ll take a look at how a variety of images were digitally retouched and enhanced in postproduction.
BASIC RETOUCHING OF SKIN
Digital images normally need some type of retouching, from a small amount of sharpening to resizing the image. Below, the basic approach to retouching will be demonstrated in several steps.
- In Photoshop, open the original image, then duplicate the background layer (Layer>Duplicate Layer). If necessary, sharpen your image first, flatten the layer (Layer>Flatten Image), then create a new duplicate layer and proceed to step 2.
- Now, we’ll use the Healing Brush to remove blemishes, veins, and stretch marks. Using a small brush, select an area with the same skin tones and lighting as the area to be retouched. Use the Alt/Opt key to select the unblemished area, then click over the blemish area to remove it. The Healing Brush matches the texture and lighting of the sampled area, giving the blemished area a natural look.
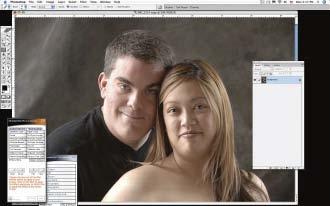
The original image, before retouching the under-eye area.

The affected areas were selected using the Patch tool.
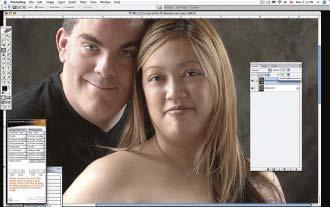
By sliding the selected areas down to an area with smoother skin, we were able to improve the portrait.
3. To remove or soften bags under the eyes, duplicate the layer. Using the Patch tool, select the affected under-eye area. With the selection made, move the selection down to an area with smooth skin.
4. With the selection still active, lower the opacity of the layer to around 40–60%, depending upon what gives a more natural look to the eyes. Then flatten the image (Layer>Flatten Image).
DIGITAL SLIMMING
The liquify filter is a wonderful tool that can be used to slightly slim the arms, under the chin, and along the body line. Here’s how it’s done:
- In Photoshop, go to Filter>Liquify. (Make sure you are working on a flattened image.)
- Using a very large brush, select the Forward Warp tool and carefully nudge along the length of the arm to slightly slim it. Moving to the inside of the arm, reduce the size of the brush and nudge along the inside of the arm.
- Using the Pucker tool, gently reduce the area under the chin, along the chin line, and at the cheek area. Go slow and keep an eye on your results, backing up if the correction does not look natural.
- Moving to the midsection, you can create the illusion of a slimmer subject by putting a little more curve in the back. Using the Forward Warp tool again, slightly push the curve of the back in.
- To further give the impression of a slimmer midsection, take the Pucker tool and the Forward Warp tool to the other side of the tummy and gently push in the edges.
The liquify filter was chosen, and a large brush was used to nudge along the length of the arm.

Next, the Pucker tool was used to slightly slim under and around the chin and in the cheek area.

The forward warp tool was used to put a little more curve in the back for a slimmer appearance.

The Pucker tool and Forward Warp tool were used on the other side of the tummy to slightly slim and enhance the body line.
Once the subject is retouched, you can further enhance the image using Nik Software’s Midnight filter, as demonstrated below.
NIK SOFTWARE’S MIDNIGHT FILTER
Creating portraits reminiscent of paintings is very easy with Nik’s Midnight filter, found in the Nik Color Efex 2.0 Stylizing Filter set. The filter softens the edges in the image, darkens shadow areas, and lightens highlights. With the right image, the filter can be a perfect creative tool for creating a romantic, moody effect.