The Art of Pregnancy Photography (13 page)
Read The Art of Pregnancy Photography Online
Authors: Jennifer George
Tags: #Health & Fitness, #Pregnancy & Childbirth, #Photography, #Subjects & Themes, #Portraits, #Techniques, #General

Once you’ve located the ideal window light source, position the camera at a 90-degree angle to the window. The subject should be 90 degrees from the camera angle, creating a triangle from the window, to the subject, to the camera. The subject then should have light falling on the side, not the front or back. A reflector or subtractive panel should be placed on the opposite side of the window with the subject in the middle. Again, be sure to avoid photographing the subject near a window when the sun is low in the sky and level with the window. This creates a hard light quality that will cast unwanted dark shadows on the subject’s face.
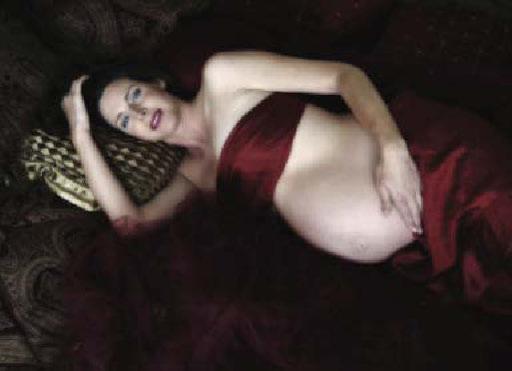
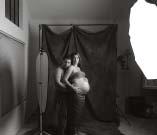
It is common to have limited space in a traditional home setting. Standing on a ladder increased the distance between the camera and the subject. To create this beautifully lit image, the subject was posed facing the large master bedroom window, and the camera was positioned between her and the light source. Note that the positions of her arms create a graceful, visually pleasing S curve in the composition. A Fuji FinePix S3 Pro and an exposure of f/3.8 at
1
/180 second at ISO 400 was used to capture the image. Nik Software’s Midnight filter was used to enhance the image postcapture.

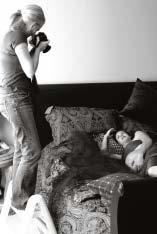
The above image was made in the couple’s master bedroom. However, the bed was too far from the window and could not be moved. Therefore, the backdrop I’d selected for the session was placed on the carpeted floor, and complementary fabrics were added to enhance the color and add texture in the image. The light coming through the window was very bright, so diffusion cloth was hung over the window to soften the light. A reflector was placed directly across from the window. Note the direction of the light and how it wrapped around the couple.
When working with window or natural light, you will find that it is necessary to work at a faster ISO rating. Given the lack of space in most homes you will also have to use a shorter focal length lens (my Tamron 28–75mm f/2.8 lens worked perfectly in this situation). This image was captured with a Fuji FinePix S3 Pro camera, with an exposure setting of f/3.6 at
1
/90 second at ISO 400.
7. STUDIO LIGHTING
W
hen conducting the pregnancy portrait session in the studio, you can create precisely the portrait lighting effect you’re after. This is a clear advantage. Keep in mind that the best light is simple, soft, diffuse, and comes from the side of the subject, rather than from overhead.
When it comes to lighting a pregnant woman, your goal is to make her appear as beautiful as possible, to use lighting that helps her appear slim and shapely and caresses her features, making them as symmetrical as possible. Using light that crosses the abdomen and falls off on the woman’s backside, then turning her face back into the light can help to showcase her face to best effect and visually slim and flatter her figure.
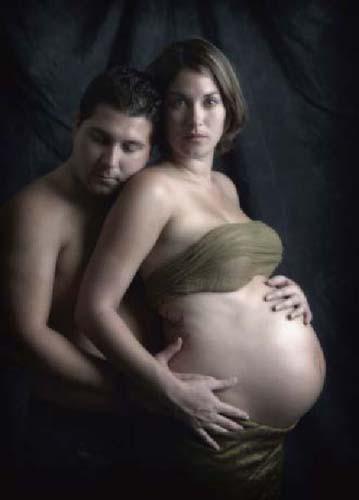
With striking subjects, you can use very dramatic lighting with a high ratio. This image was captured with a Nikon D2x and Tamron SP AF Aspherical XR Di LD 28–75mm f/2.8 lens. The setting was f/5.6 at
1
/125 second and an ISO of 100. The image was slightly retouched in Photoshop with the Healing Brush, then enhanced with Nik’s Midnight filter. Finally, the image was vignetted using the Kubota Artistic Actions Vol. Two Edge Burner action.
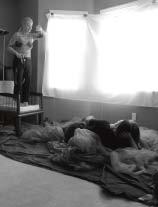
Your main goal in studio lighting should be to create a sense of depth and dimension in the image. The lighting should be controlled in such a way as to illuminate and give form to the main subject. With a softbox, such as the Norman 60-inch octagonal softbox used in this image, the edge of the light falls off quickly, illuminating only the subject, not the surrounding area. The advantage of this is that the subject becomes the focal point. This simple setup consists of a Norman Monolight ML 400, a 60-inch octagonal softbox, and a black panel attached to a stand.
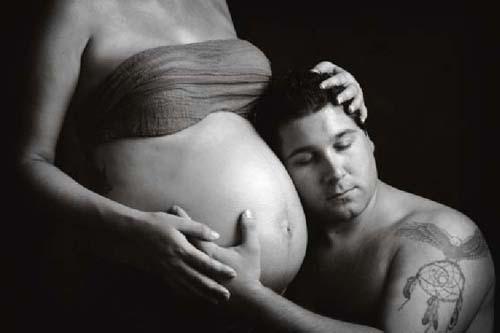
The dramatic lighting in this portrait was well suited to the subjects’ personalities and helped to create the desired mood. Using a single soft-box created the required shape and form across the mother’s midsection and the father’s face and arm. The father’s position was reversed, as compared to the pose used in the facing-page image, in order to show his tattoo. The portrait is more interesting showing a piece of their personalities.
THE TOOLBOX
Think of your camera room, and all the lighting equipment it contains, as your toolbox. When conceptualizing a portrait, determine the best tools for the job. Simple lighting is often best and can allow you to focus your attention on relaxing and complimenting your subject, finessing the pose, etc.
Your basic tools are your main light, fill light (secondary light used to lighten the shadow areas), light modifiers (softboxes, umbrellas, and other devices that fit over or on your lights), reflectors (white, silver, and gold), subtractive (black) lighting panels, light stands, backgrounds, and a light meter.
LIGHT RATIOS
To create the best-possible portrait, you must learn how to light your subject in a way that flatters her form. Often, a higher light ratio will be your best option.
A light ratio is a tool that photographers use to compare and describe the illumination levels (the highlight and shadow) produced on each side of the subject. The higher the ratio, the more dramatic the difference between the highlight and the shadow, and the greater the contrast in the image. When the subject is evenly illuminated, there is a 1:1 ratio. When the illumination is 2:1, the highlight side of the subject is twice as bright as the shadow side. In images with higher lighting ratios (e.g., 3:1), there is a more profound difference between the highlight and shadow areas. When the shadows are much darker than the highlights, the darker areas of the body seem to recede; in other words, the subject’s form can be made to appear slimmer. Conversely, the highlights will draw the viewer’s gaze.
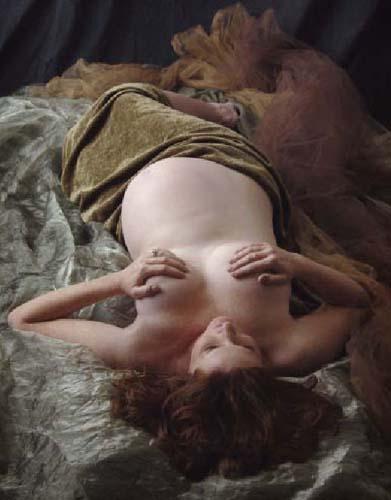
In order to give a beautiful form and shape to the subject and produce a three-dimensional effect, a higher lighting ratio was used to create this image. From the highlight side of the subject to the shadow side there was a 3-stop difference. The approach provided an added benefit of slimming the mother, with one side of her being in the shadow.