Foundation Game Design with ActionScript 3.0, Second Edition (66 page)
Read Foundation Game Design with ActionScript 3.0, Second Edition Online
Authors: Rex van der Spuy

- Mode: Normal
- Opacity: 80
- Blur: 9px
- Center
The final effect will look like
Figure 7-11
. There are no rules on how to go about choosing these settings—just play around with them until you're happy with the way the effect looks.
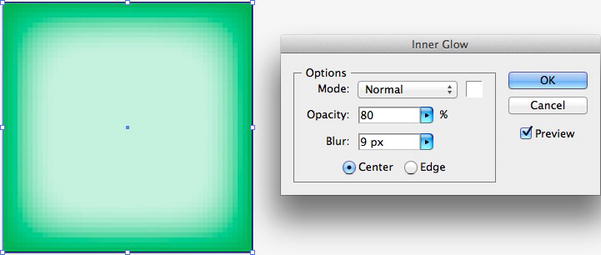
Figure 7-11.
Give the rectangle an inner glow.
If you need to change this effect, or any others you might add to a drawing object, make sure the object is selected and open the Appearance panel (
Figure 7-12
). Click the effect name to modify it. You can modify all the other visual properties of the object from the Appearance panel as well.
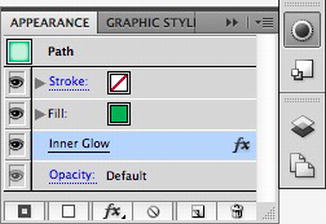
Figure 7-12.
The Appearance panel lets you modify all of an object's visual properties, such as the effects, colors, and opacity.
Next you're going to draw an inner square with rounded corners. You'll fill it with a semi-transparent gradient and add a drop-shadow effect to make it look like it's floating above the outside square.
- Choose the Rounded Rectangle Tool from the Tools bar (
Figure 7-13
). The Rounded Rectangle Tool lets you make squares and rectangles with round corners.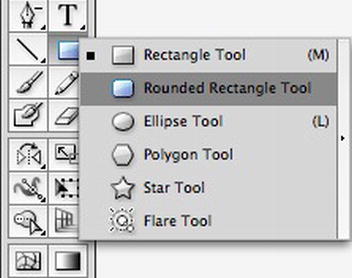
Figure 7-13.
Select the Rounded Rectangle Tool. - Click the Preferences button in the Control Panel at the top of the workspace. Set the Corner Radius to 8px and click the OK button, as shown in
Figure 7-14
. The corner radius determines by how much to round the corners of the rectangle. (You can also change the corner radius interactively while you draw the rectangle by pressing the up or down arrows on the keyboard.)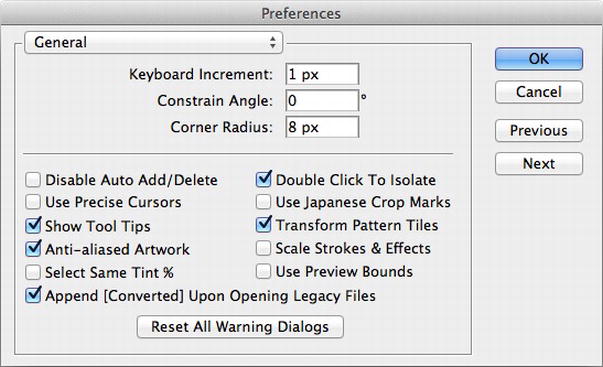
Figure 7-14.
Set the rounded rectangle's corner radius in the Preferences window. - Draw a rounded rectangle of any size over the first rectangle you drew, as shown in
Figure 7-15
. It doesn't matter what the fill color is, but it shouldn't have a stroke color.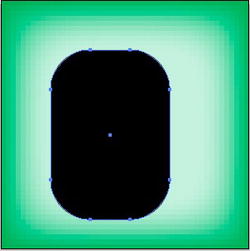
Figure 7-15.
Make sure the new rounded rectangle doesn't have a stroke color. - Make sure that this new rectangle is still selected, and enter the follow values in the X, Y, W (width) and H (height) fields in the Control Panel:
- X: 25
- Y: 25
- W: 35
- H: 35
This gives the square an exact height and width and centers it, as shown in
Figure 7-16
. - X: 25

Figure 7-16.
Enter the exact dimensions and position in the Control Panel.
You now have two drawing objects on the artboard. If you double-click on either of them with the black arrow, Illustrator will switch to
isolation mode.
This dims and disables all the other objects on the artboard except the selected object so that it's easier for you to work on the selected item. To exit isolation mode, double-click away from the selected object.
Next, you're going to fill this new square with a semi-transparent gradient fill.
- Open the Gradient panel. Drag a light blue swatch from the Swatches panel into the gradient color stop on the very left side of the gradient preview. Drag a black swatch from the Swatches panel into the very right color stop in the gradient preview. Move the gradient midpoint slider about 75% to the right.
Figure 7-17
illustrates this.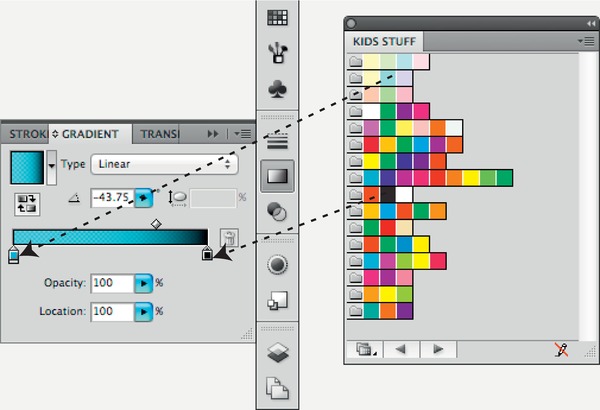
Figure 7-17.
Create the gradient by dragging swatches into the color stops. - Select the right-most color stop, which should now be black, and change the Opacity value to 0. You should now see this gradient fill being applied to the new square you've drawn.
- Select the Gradient Tool in the Tools bar. You'll see a long bar appear across the square. This is called the
gradient annotator
. It's a really useful tool that lets you interactively change the rotation, size, and position of the gradient by moving it around the artboard.
Figure 7-18
shows what you'll see. You can drag, rotate, resize, and deform the gradient with this tool; you can also change the gradient's colors and color distribution.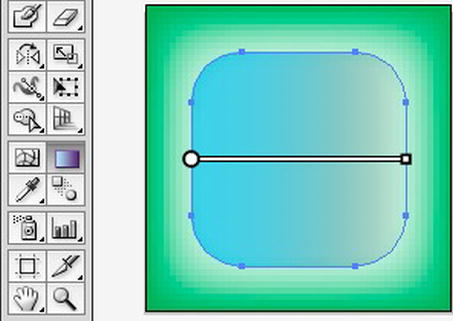
Figure 7-18.
Select the gradient tool to display the gradient annotator. - Rotate and position the gradient annotator so that gradient runs diagonally across the square, from the top left to the bottom right, as shown in
Figure 7-19
.
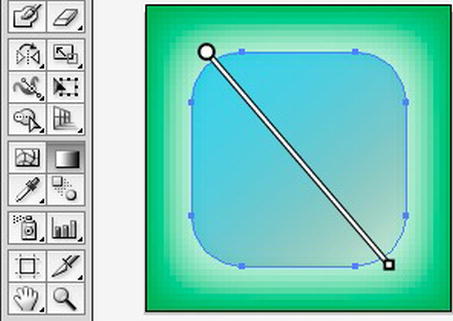
Figure 7-19.
Rotate and reposition the gradient.
Now add a shallow drop-shadow effect to give the inner square a bit more depth.
- Make sure that the inner square is still selected and choose Effect
 StylizeDrop Shadow from Illustrator's main menu. The Drop Shadow window will open (see
Figure 7-20
). Enter the following values:- Mode: Normal
- Opacity: 30
- X Offset: 1px
- Y Offset: 1px
- Blur: 2px
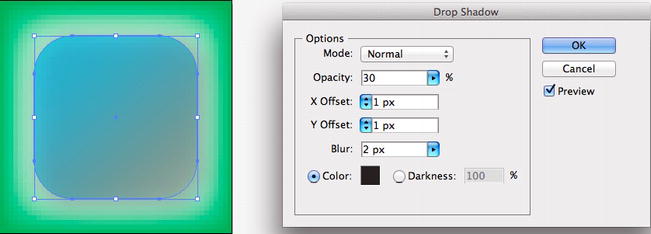
Figure 7-20.
Add a drop shadow to the inner square.Make sure that the Preview option is selected so that you can see the changes in the square while you're setting these values. Again, it's simply a question of choosing settings that seem to have a nice effect.
- Mode: Normal