Building Web Sites All-in-One For Dummies® (113 page)
Read Building Web Sites All-in-One For Dummies® Online
Authors: Claudia Snell

About WordPress
WordPress also uses a combination of PHP code and a MySQL database to display and maintain the blog. As of this writing, the current version of WordPress is WordPress 2.6.1. You can download WordPress at
http://wordpress.org/download
.
To run WordPress, your Web server needs PHP 4.3 or above and MySQL 4.0 or above. The designers of the application claim it works best with an Apache or a LiteSpeed server.
WordPress comes with installation instructions. Although the application doesn't have a full-fledged manual, you can find impressive documentation on the application at
http://codex.wordpress.org/Main_Page
. The WordPress Web site also features an impressive support section (
http://wordpress.org/support
) that covers many installation issues as well as how to modify templates.
Installing WordPress
If your server has the necessary features (listed in the preceding section) to run WordPress, you're ready to install the application. Detailed installation instructions can be found here:
http://codex.wordpress.org/Installing_WordPress
To give you an idea of how easy it is to install the application, here's a condensed version of the installation process.
1.
Download the application and unzip the files.
The files needed to run the application are downloaded into a folder called WordPress.
2.
Create a new MySQL database on your server.
You can easily create a MySQL database through your Web hosting service's control panel or a server application called phpMyAdmin. When you create the database, you're prompted for a name, user name, and password.
3.
Open
wp-config-sample.php
in a word-processing application.
We recommend using an application like Notepad to make your changes. More sophisticated word-processing applications use smart quotes (they look like this: “ ” â '), which will cause errors when used to designate the database name, user name, and password.
4.
Change the database information.
Modify the file by changing the default name of the database, user name, and password.
5.
Save the file as
wp-config.php
.
6.
Upload the files to a folder on your server.
Create a folder on your server. The logical name for that file is Blog. Upload the files to this folder.
7.
Install the application on your server.
To install the application, navigate to the
install.php
file on your server. The default location is
www.
mywebsite.com
/blog/wp-admin/install.php
.
8.
Follow the prompts to install the application.
The installation dialog box prompts you for a name for your blog and your e-mail address. After you supply that information, WordPress automatically fills in the table for your database. The application generates a user name and password.
9.
Write down your user name and password.
You need these to log in to your blog, administer it, and post entries. If you're not crazy about the user name or password, you can change one or both of them when you administer the blog.
10.
Log in to your blog.
You'll find a wp-login.php link at the bottom of the installation dialog box. Click the link to begin blogging.
Modifying a WordPress blog
After you install a WordPress blog, you can modify the blog to suit the Web site to which it linked. You can modify an existing theme (skin) or upload a new theme to your server. The downloaded version of WordPress has two themes. However, WordPress is a popular application, and many developers have created themes for the application. To modify the look and feel of your WordPress blog with a theme, follow these steps:
1.
Open your Web browser and navigate to
http://wordpress.org/extend/themes
.
The WordPress Theme Directory Web page appears. (See Figure 1-5.)
2.
Navigate to a theme you like.
As of this writing, there are more than 200 themes. You can speed up your search by displaying themes that have color schemes similar to the site to which they'll be linked. You can sort by color by enabling one or more check boxes.
3.
Click the thumbnail to preview the theme in your browser.
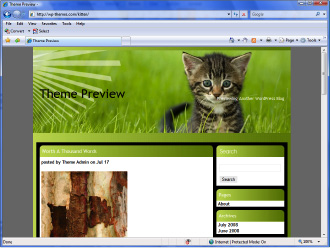
The test site appears in a new browser window. (See Figure 1-6.)
Figure 1-5:
Select a new theme for a WordPress blog.
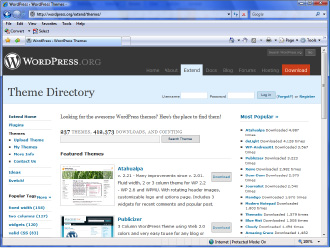
Figure 1-6:
Preview a WordPress theme.
4.
When you find a theme you'd like to use, click the Download link and then follow the prompts to download the file to your desktop.
5.
Unzip the file.
6.
If desired, modify the theme in your HTML editing application.
You'll find tutorials on modifying themes at this URL:
http://codex.wordpress.org/Blog_Design_and_Layout#Themes_and_Templates
7.
Upload the Themes folder to the following directory on your server:
www.mywebsite.com/blog/wp-content/themes
After uploading a Themes folder to this directory, you can change the look of your blog.
8.
Log in to your blog.
When you log in as administrator, the Dashboard section of your blog appears, which is where you administer the blog, write new posts, add new users, and so on. (See Figure 1-7.)
9.
Click the Presentation tab.
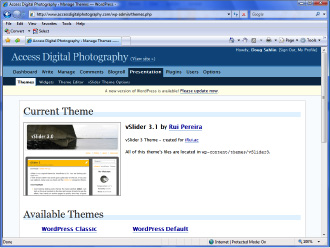
Your Web browser refreshes and displays the themes you uploaded to your server. (See Figure 1-8.)
Figure 1-7:
The WordPress Dashboard.
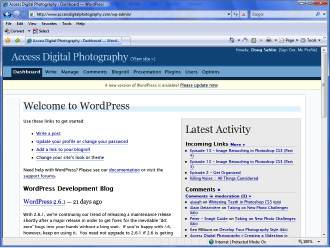
Figure 1-8:
Choose a theme from the uploads.
10.
Select the desired theme.
The previously used theme is replaced.
Posting a WordPress blog entry
Blogs are all about getting the word out. WordPress makes it easy for you to post entries to your blog. You can add images and hyperlinks when posting a message to your blog. To add an entry to your blog, follow these steps:
1.
Log in to your WordPress blog.
When you log in as administrator, WordPress displays the Dashboard, which enables you to administer your blog.
2.
Click the Write tab.
Your Web browser refreshes to the Write page of your blog.
3.
Enter the desired information.
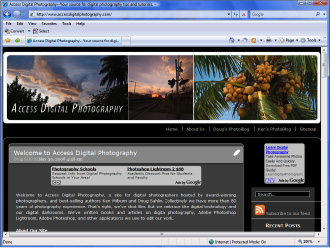
When you post an entry to your blog, you can format the text and add images to the post. You can also add hyperlinks by clicking the Link icon. This opens a dialog box that enables you to enter the URL and determine whether the Web page opens in the same browser window or in a new one. Figure 1-9 shows a post being written. Figure 1-10 shows the post as it appears on the blog.
Figure 1-9:
Writing a post.
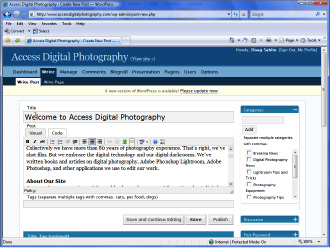
Figure 1-10:
The entry, as it appears on the blog.
 If you or your client posts information on several different topics, you can create a category for each topic. This makes it easier to manage your blog.
