Windows Server 2008 R2 Unleashed (97 page)
Read Windows Server 2008 R2 Unleashed Online
Authors: Noel Morimoto

15
ptg
FIGURE 15.4
Creating a compliant health policy.
Creating a Health Policy for Noncompliant Clients
In addition to creating a health policy for compliant clients, there must be a policy for
clients who fail one or more of the checks in the SHV. To create this policy, do the following:
1. Open the Network Policy Server MMC tool (Start, All Programs, Administrative
Tools, Network Policy Server).
2. In the node pane, navigate to Policies, Health Policies.
3. Right-click Health Policies and choose New.
4. Enter a name for the policy, such as NonCompliant-Clients. In this example, we
select that the client fails one or more SHV checks setting from the dialog box.
Check the box next to the Windows System Health Validator, and click OK to save
the policy.
468
CHAPTER 15
Security Policies, Network Policy Server, and Network Access
Protection
Creating a Network Policy for Compliant Clients
After the SHV and two health policies have been created, network policies for both
compliant and noncompliant clients need to be created. These network policies will define
what type of access a compliant or a noncompliant client will have. To create the compli-
ant network policy for this example, do the following:
1. From the Network Policy MMC tool, navigate to Policies, Network Policies from
the node pane.
2. Right-click the Network Policies node, and choose New.
3. On the Specify Network Policy Name and Connection Type page, enter a descriptive
policy name, such as Compliant-Network-Full-Access, and click Next (leave the
type of server as Unspecified).
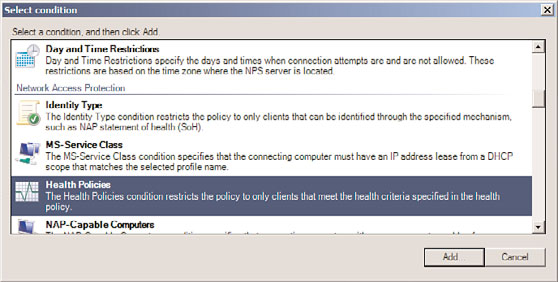
4. On the Specify Conditions page, click the Add button.
5. Select Health Policies from the list, as shown in Figure 15.5, and click the Add button.
ptg
FIGURE 15.5
Creating a network policy for compliant clients.
6. From the list of health policies, choose the Compliant-Clients policy previously
created, and click OK.
7. Click Next to continue.
8. On the Specify Access Permission page, select the Access Granted option button, and
click Next to continue.
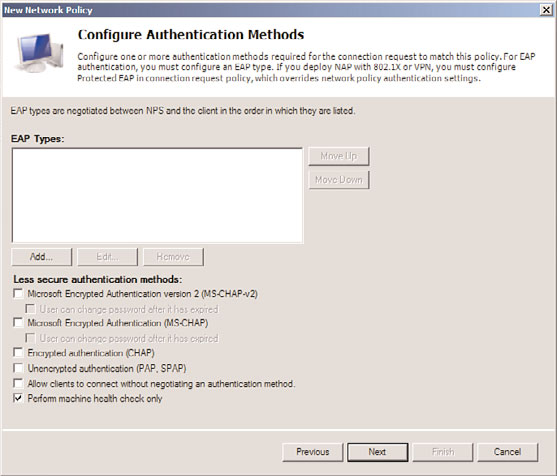
9. On the Configure Authentication Methods page, select only the Perform Machine
Health Check Only check box and deselect any other ones, as shown in Figure 15.6.
Click Next to continue.
10. On the Configure Constraints page, leave the defaults in place, and click Next.
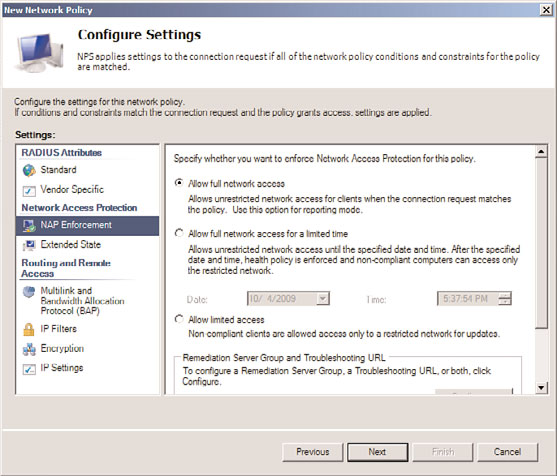
11. On the Configure Settings page, ensure that Allow Full Network Access is selected
under NAP Enforcement, as shown in Figure 15.7. Click Next to continue.
12. Click Finish to complete the wizard.
Enforcing Policy Settings with a Network Policy Server
469
15
ptg
FIGURE 15.6
Configuring authentication methods for the compliant network policy.
FIGURE 15.7
Validating NAP Enforcement settings.
470
CHAPTER 15
Security Policies, Network Policy Server, and Network Access
Protection
Creating a Network Policy for Noncompliant Clients
After a network policy has been made for compliant clients, an equivalent policy needs to
be created for noncompliant clients. The process is similar, with a few changes as follows:
1. From the Network Policy MMC tool, navigate to Policies, Network Policies from
the node pane.
2. Right-click the Network Policies node, and choose New.
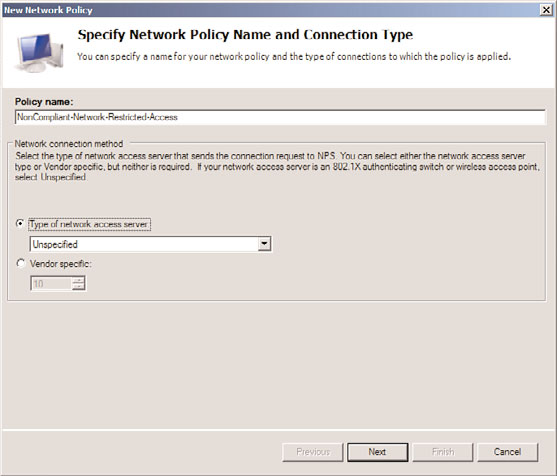
3. On the Specify Network Policy Name and Connection Type page, shown in Figure
15.8, enter a descriptive policy name, such as NonCompliant-Network-Restricted-
Access, and click Next (leave the type of server as Unspecified).
ptg
FIGURE 15.8
Creating a network policy for noncompliant clients.
4. On the Specify Conditions page, click the Add button.
5. Select Health Policies from the list, and click the Add button.
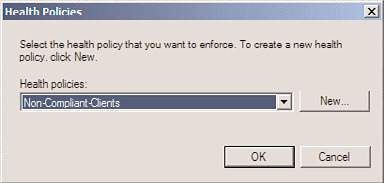
6. From the list of health policies, choose the NonCompliant-Clients policy previously
created, as shown in Figure 15.9, and click OK.
7. Click Next to continue.
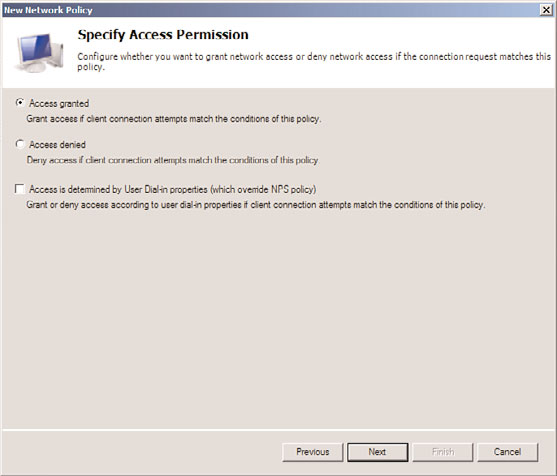
8. On the Specify Access Permission page, shown in Figure 15.10, select the Access
Granted option button, and click Next to continue.
Enforcing Policy Settings with a Network Policy Server
471
FIGURE 15.9
Adding the noncompliant client’s health policy to the network policy.
15
ptg
FIGURE 15.10
Specifying access permission to the network policy.
NOTE
It might seem counterintuitive to select the Access Granted option button for a non-
compliant network policy. It’s important to note, however, that this simply means that
the access is granted to the policy itself, not to the network. If the Access Granted
option is not selected, the policy will not work.
9. On the Configure Authentication Methods page, select only the Perform Machine
Health Check Only check box and deselect any other ones. Click Next to continue.
10. On the Configure Constraints page, leave the defaults in place, and click Next.
472
CHAPTER 15
Security Policies, Network Policy Server, and Network Access
Protection
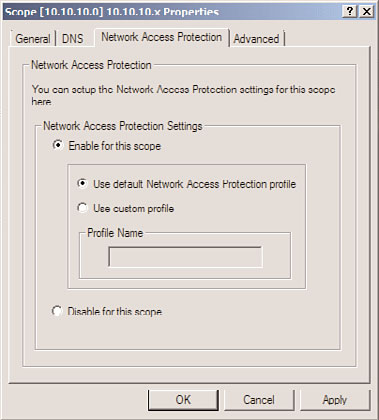
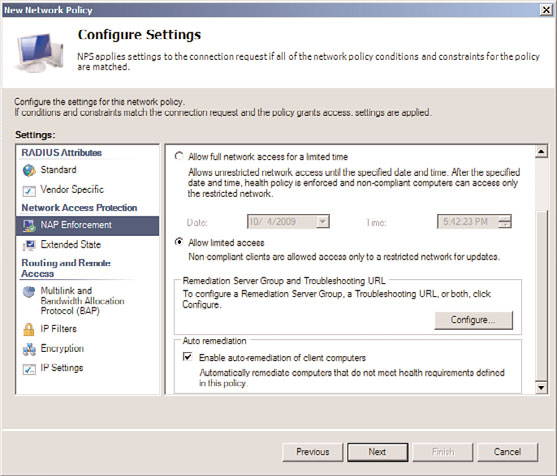
11. On the Configure Settings page, select NAP Enforcement and select the Allow Limited
Access option button, as shown in Figure 15.11. If auto remediation will be enabled
(allowing the server to access other servers such as WSUS or DNS), then check the
Enable Auto-remediation of Client Computers check box. Click Next to continue.
ptg
FIGURE 15.11
Configuration Settings options for NAP Enforcement.
12. Click Finish to complete the wizard.
After all five steps have been performed on the NPS system, the individual services can be
integrated with the NPS system to restrict clients based on the health and network policies
that were created. This includes the DHCP Server role and the services that control 802.1X
and RRAS for VPN. In this example, we will configure the DHCP role to block clients
based on the SHV that we created in the earlier steps.
Configuring a DHCP Server to Restrict Client Leases Based on the
NPS Policy
After the NPS policies have been created, the DHCP server and DHCP scope used can be
configured to use NAP settings to validate the client health before granting IP addresses.
In the example we’ve been using so far, this would restrict only those clients with a valid
and up-to-date antivirus application from getting a DHCP address.
To configure the DHCP scope for NPS, do the following:
1. On the DHCP server, open the DHCP MMC tool (Start, All Programs, Administrative
Tools, DHCP).