The Complete Beginners Guide to Mac OS X El Capitan (7 page)
Read The Complete Beginners Guide to Mac OS X El Capitan Online
Authors: Scott La Counte

To return to the normal view, click the green button in the upper left corner of the app once more (you can also hit the ESC key on your keyboard).
Method 2
As you are probably noticing, most things in OS X can happen by several different methods; side-by-side view has two. The second way to get apps is to open your Mission Control , and drag the app to the top menu.
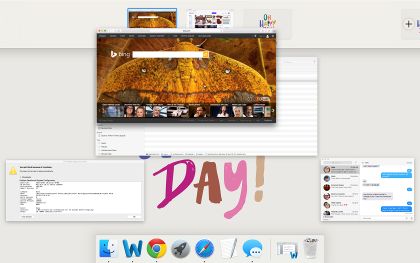
You’ll notice, a grey box appear and the box appears to split.
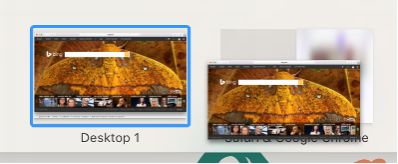
Once you drop it into that box, you’ll see a side-by-side preview. Once you click the preview, it will maximize.

Returning to the non-split screen is done the same way as method 1 (click the green box in the upper left corner or hit the ESC key on the keyboard)
Internet
The Mac is a beautiful machine, but you can only admire that desktop for so long; eventually you’ll want to get on the Internet, so let me explain how.
There are two methods: Ethernet (i.e. plugging in a LAN cable to your computer) and Wireless.
Setting Up With Ethernet
All new Mac computers are set up with Wi-Fi; iMacs also have Ethernet ports to plug in a network cable. This option isn’t available on any of the Mac laptops—though you can buy an adaptor if you absolutely must have it.
If you have a basic Internet modem, then set up is pretty easy. Just plug a network cable into your Internet hub, and plug the other end into your Mac. Once it’s plugged in, the Internet should work.
Newer Macs come with top of the line wireless radios for Wi-Fi, so you should be perfectly fine without using the Ethernet port.
Setting Up Wireless Networks
Setting up a wireless connection is also pretty simple. Just click the Wi-Fi menu on the menu bar. It looks like the image below and is near the upper right corner:

As long as there’s a wireless network in range, it will show up when you click it (sometimes it does take a few seconds to appear).
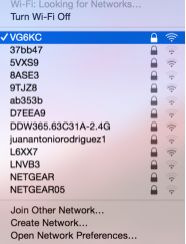
If there’s a lock next to the Wi-Fi name, then you’ll need to know the passcode (if it’s a home Internet connection, then it’s usually on the bottom of your Internet modem; if it’s at a business, then you’ll have to ask for the code. If there’s no lock, then it’s an open network. You usually see this kind of network at places like Starbucks.
If it’s a locked network, then as soon as you click on it, it will ask for the code; once it’s entered and you click Connect, then you’re connected (assuming you added it right); if it’s not locked then once you click on it, then it will attempt to connect.
If you own one of the above-mentioned computers, or would rather connect to a network wirelessly, you can do it by clicking on the Wi-Fi menulet in the top menu bar.
Airport Express / Airport Extreme
If you need more range in your wireless connection, or want to set up a private network, Apple sales to Mac accessories. One is the Airport Express ($99) and the other is the Airport Extreme ($199 or $299 to $399 if you’d like one with a hard drive).
The Express is a good option for people wanting to add a private network (so, for instance, you can have a network just for guest and guest printing); the Airport Extreme gives excellent range; I use one in my home because the modem supplied with my phone company could barely reach the next room over and the signal strength was weak; the Extreme not only got to the next room, but it got several more rooms—I can now get a signal more than 100 feet from where the Extreme is located. It’s a pretty easy installation, and Apple has videos for those who need extra help.
The more expensive models are also a good option for backing up computers. The $299 and $399 models offer up to 3TB of storage; the way it works is your computer connects to it, and will back up your computer in the background, so your computer is always being backed up. These models also let you share files. So, for instance, if you want a private storage locker for anyone who connects to your network, then you could do so here.
Safari
Just as a Windows computer has Internet Explorer as the default web browser, Mac has Safari as the default web browser; if you’ve used Safari on your iPhone or iPad then you should already be accustomed to using it.
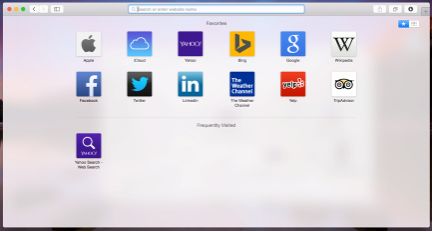
Noticeably absent from Safari is something called “Flash”. Flash is what you might used to watch some videos and other web apps; you can always download it, but this will affect the battery life of your laptop, as Flash tends to drain the battery quickly—which is one of the reasons Apple does not include it.
You are also free to download other Internet browsers. Some of the popular free ones are Google Chrome (
www.google.com/chrome/
), Mozilla Firefox (
www.mozilla.org/firefox
), and Opera (
www.opera.com
).
One of the biggest advantages of using Safari over another web browser is a feature called Handoff. Let’s say you’re reading an article on your phone on the subway coming into work; you get to work and want to pick up where you left off on a larger Mac screen; just open up Safari, then click the two square boxes in the upper right corner.

If your iPhone or iPad is synced with the computer, then you’ll see its name and pages that it’s currently browsing. You can also handoff a Mac page to your iPhone or iPad in the same way.
In addition to websites, handoff also lets you seamlessly sync things like maps, messages, and documents (Pages, Numbers, and Presentation documents).
Mail
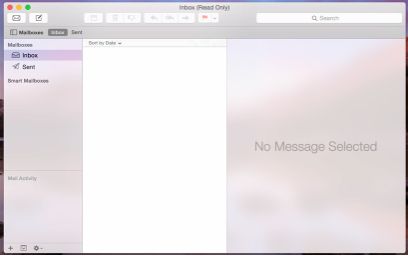
Mail is the Mac equivalent of Outlook; like Safari, it works in a very similar way to iPad and iPhone. Apple will provide you with a free email address that ends @icloud.com, but you can also add normal email into the application (like Hotmail, Yahoo, and Gmail).
Adding Accounts
To get started, you need to add your email account. Locate the Mail app by clicking on Launchpad, and then clicking the Mail app icon.
