Oracle RMAN 11g Backup and Recovery (58 page)
Read Oracle RMAN 11g Backup and Recovery Online
Authors: Robert Freeman

Step 6.
Leaving the default parameters for now, press ENTER to choose the default answer. The following output is returned:
Loading of Oracle Secure Backup software from CD ROM is complete.
You may unmount and remove the CD ROM.
Would you like to continue Oracle Secure Backup installation with 'installob' now?
(The Oracle Secure Backup Installation Guide contains complete information about installob.)
Please answer 'yes' or 'no' [yes]:
Step 7.
Again, press ENTER to choose the default answer. The following output is returned:
- - - - - - - - - - - - - - - - - - - - - - - - - - -
Welcome to installob, Oracle Secure Backup’s installation program.
For most questions, a default answer appears enclosed in square brackets.
Press Enter to select this answer.
Please wait a few seconds while I learn about this machine... done.
Have you already reviewed and customized install/obparameters for your Oracle Secure Backup installation [yes]?
Step 8.
Again, press ENTER to choose the default answer and to leave the default parameters. The following output is returned:
- - - - - - - - - - - - - - - - - - - - - - - - - - -
Oracle Secure Backup is not yet installed on this machine.
Oracle Secure Backup’s Web server has been loaded, but is not yet configured.
Choose from one of the following options. The option you choose defines the software components to be installed.
Chapter 5: Oracle Secure Backup
125
Configuration of this host is required after installation completes.
You can install the software on this host in one of the following ways:
(a) administrative server, media server and client
(b) media server and client
(c) client
If you are not sure which option to choose, please refer to the Oracle Secure Backup Installation Guide. (a,b or c) [a]?
Step 9.
You are going to install all three components of OSB on the same server, so again press ENTER to choose the default answer. The following output is returned:
Beginning the installation. This will take just a minute and will produce several lines of informational output.
Installing Oracle Secure Backup on lin32 (Linux version 2.6.18-53.el5)
You must now enter a password for the Oracle Secure Backup encryption key store.
Oracle suggests you choose a password of at least 8 characters in length, containing a mixture of alphabetic and numeric characters.
Please enter the key store password:
Re-type password for verification:
Step 10.
Enter the OSB encryption key twice. The key is not displayed. You will see the following output:
You must now enter a password for the Oracle Secure Backup 'admin' user. Oracle suggests you choose a password of at least 8 characters in length, containing a mixture of alphabetic and numeric characters.
Please enter the admin password:
Re-type password for verification:
Step 11.
Enter the admin password twice. The password is not displayed. You will see the following output:
You should now enter an email address for the Oracle Secure Backup 'admin' user.
Oracle Secure Backup uses this email address to send job summary reports and to notify the user when a job requires input. If you leave this blank, you can set it later using the obtool’s 'chuser' command.
Please enter the admin email address:
Step 12.
Leave the e-mail address blank for now. The following output is returned: generating links for admin installation with Web server
updating /etc/ld.so.conf
checking Oracle Secure Backup’s configuration file (/etc/obconfig)
setting Oracle Secure Backup directory to /usr/local/oracle/backup in /etc/obconfig setting local database directory to /usr/etc/ob in /etc/obconfig
setting temp directory to /usr/tmp in /etc/obconfig
setting administrative directory to /usr/local/oracle/backup/admin in /etc/obconfig protecting the Oracle Secure Backup directory
creating /etc/rc.d/init.d/observiced
activating observiced via chkconfig
initializing the administrative domain
****************************** N O T E ******************************
On Linux systems Oracle recommends that you answer no to the next two questions.
The preferred mode of operation on Linux systems is to use the /dev/sg devices for
126
Part II: Setup Principles and Practices
attach points as described in the 'ReadMe' and in the 'Installation and
Configuration Guide'.
Is lin32 connected to any tape libraries that you’d like to use with Oracle Secure Backup [no]?
Is lin32 connected to any tape drives that you’d like to use with Oracle Secure Backup [no]?
Step 13.
Since, in this example, you use a Linux system, answer “no,” as recommended by Oracle, and configure the media server later. The following summary is returned: Installation summary:
Installation Host OS Driver OS Move Reboot Mode Name Name Installed? Required? Required?
admin lin32 Linux no no no
Oracle Secure Backup is now ready for your use.
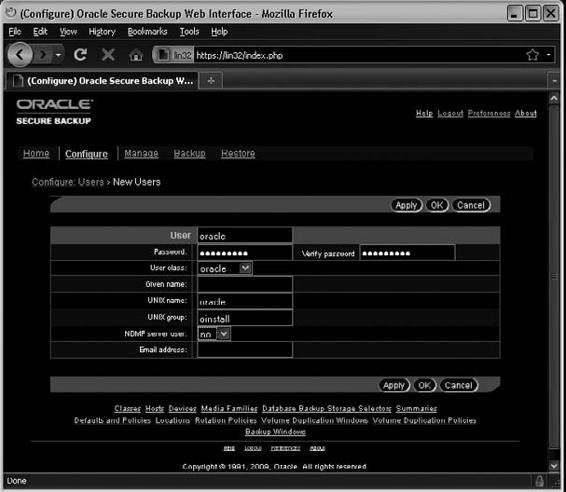
The OSB administrative server, media server, and client are now installed. The OSB Web tool is used to configure the tape library and tape drives. Let’s add the oracle user and a Database Backup Storage Selector to enable backup of an Oracle database.
Step 14.
Connect and log into the OSB Web tool using the https://
Step 15.
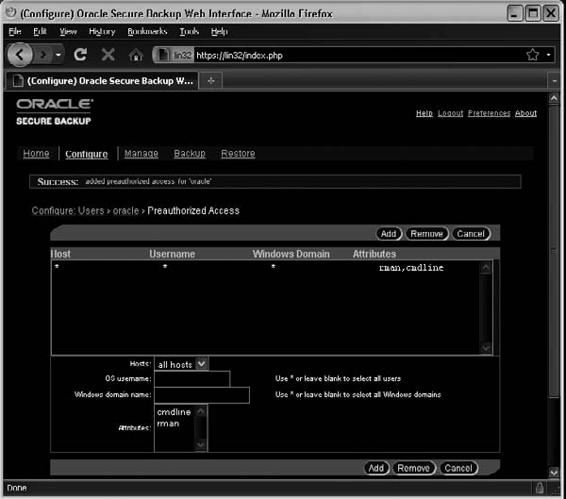
After the oracle user is added, click the Edit button, and change Preauthorized Access:
Chapter 5: Oracle Secure Backup
127
Step 16.
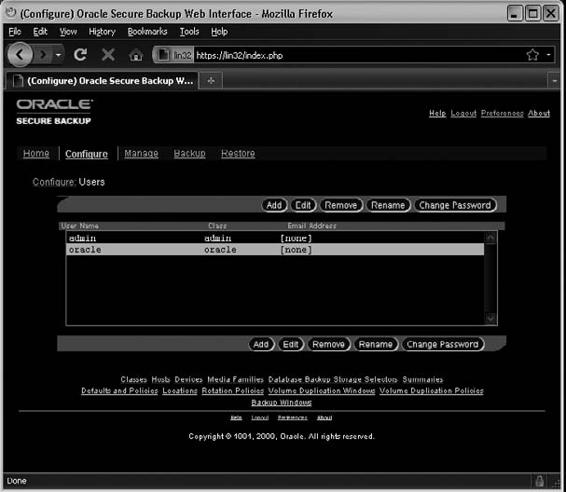
As a result, you will have the admin and oracle users:
128
Part II: Setup Principles and Practices
Step 17.
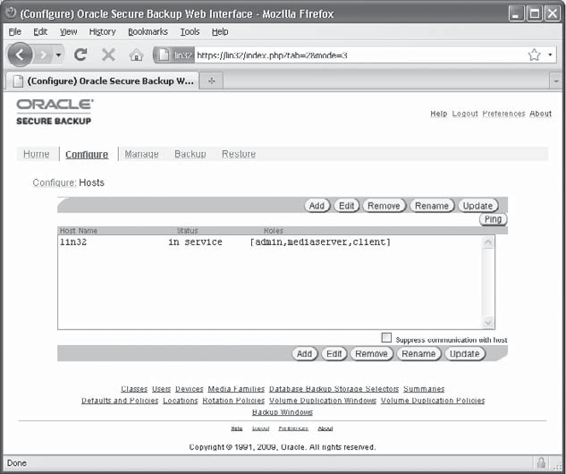
Go to
Configure: Hosts,
and make sure that
the server has the
mediaserver role,
as shown here.
Step 18.
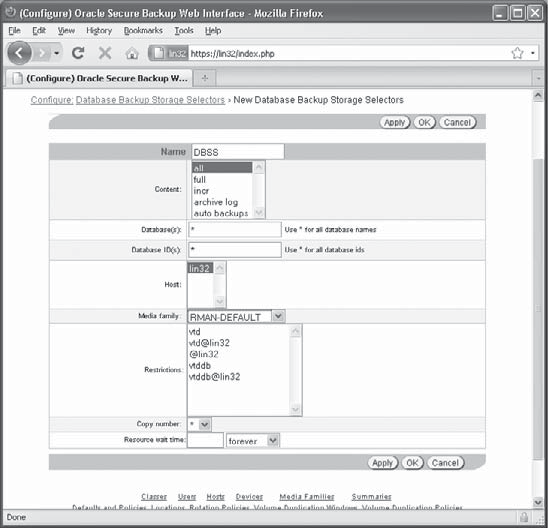
To add a storage
selector, click the Database
Backup Storage Selectors link
at the bottom of the Configure
page, click Add, and fill in the
fields, as shown in the
illustration.
Chapter 5: Oracle Secure Backup
129
Step 19.
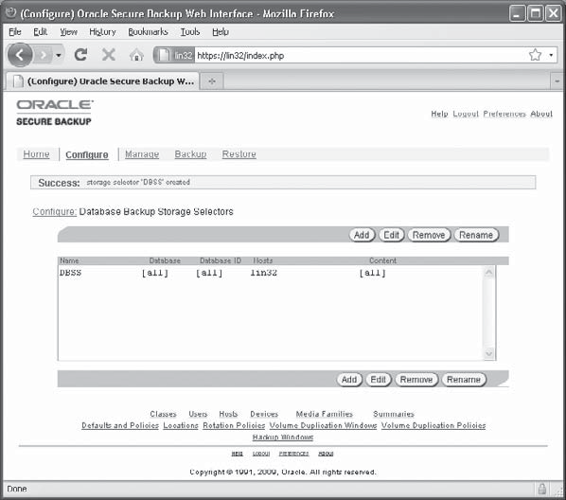
Click OK
and the storage will
be created, as shown
at right.
Step 20.
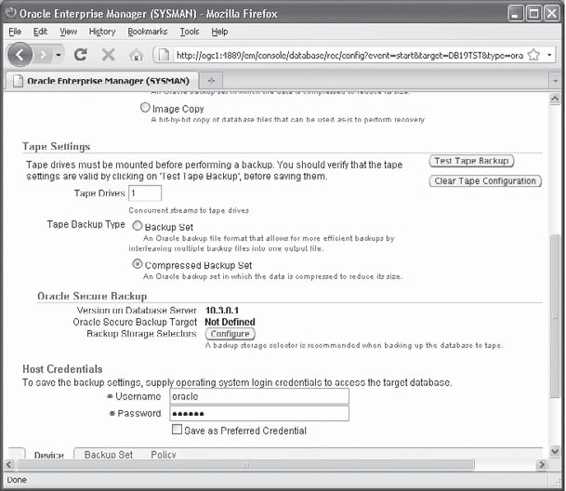
Now, let’s
configure OEM for OSB
usage. Connect to the
database and go to the
Availability tab in OEM.
Click Backup Settings
and go to the end of
the page shown in this
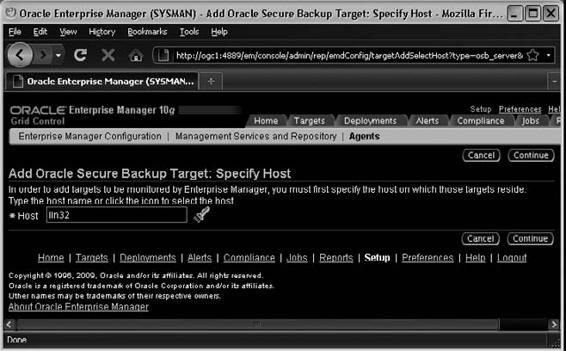
illustration.
