Maximum Flavor: Recipes That Will Change the Way You Cook (27 page)
Read Maximum Flavor: Recipes That Will Change the Way You Cook Online
Authors: Aki Kamozawa,H. Alexander Talbot
Tags: #Cooking, #Reference, #Courses & Dishes, #General, #Methods

MAKE THE CAKE:
In a medium saucepan, combine the dates, carrot juice, ginger juice, allspice, cinnamon, nutmeg, and cloves and set over medium-high heat. Once the mixture begins to boil, remove the pan from the heat and stir in the baking soda. Put the mixture in a blender and puree on low. Increase the speed to medium high and puree until smooth. Scrape the mixture into a bowl. Set aside at room temperature.
In a stand mixer fitted with the paddle attachment, beat the butter, granulated sugar, baking powder, and salt until light and fluffy. Gradually beat in the eggs and vanilla on medium-low speed. Don’t worry if the mixture looks a bit curdled. Add half of the flour, mixing on low until it is incorporated, and then add all of the date mixture, mixing on low until it is absorbed. Add all of the remaining flour and mix on low until it is just blended. Don’t overbeat the batter.
Remove the baking dish from the refrigerator and scrape the batter into the dish. Bake until the cake is just firm and a cake tester inserted in the center comes out with moist crumbs attached, 40 to 45 minutes. Remove the pan from the oven and let the cake cool slightly before serving. Serve warm with the reserved coconut sauce.
DATES (the fruit of date palm tree) are drupes, characterized by the fact that the flesh surrounds the seed. Usually found in the dried fruit section of supermarkets, they are intensely sweet and rich in flavor with a relatively thick skin and tender flesh. They are good sources of fiber, and contain tannins, vitamins, calcium, magnesium, and iron. They are delicious eaten out of hand; when added to baked goods, like Sticky Carrot Coconut Pudding, they add moisture and a complex sweetness that will leave your taste buds begging for more.

MICROWAVE LEMON FAIRY CAKES
ALBERT ADRIÀ DEVELOPED THE ORIGINAL MICROWAVE SPONGE
cake at the iconic Spanish restaurant El Bulli: The N
2
O from a whipped cream dispenser acts as the leavening, and the microwave provides a uniform cooking environment that helps create the finished texture of the cake. We loved the idea of his little creations and wanted to play around with different flavors in our own kitchen. The first time we made these lemon cakes, the only paper cups in the house were printed with Tinker Bell and her fairies. Once we tasted the cakes, we realized that fairy cakes was the perfect description for these dainty morsels filled with bright lemon flavor that almost seem to dissolve on your tongue. The tangy citrus paired with the subtle heat from the cayenne wakes up your palate and leaves you automatically reaching for more.
MAKES 12 CAKES
MICROWAVE LEMON CURD
4 tablespoons 56 grams
unsalted butter
½ cup plus 2 tablespoons 140 grams
fresh lemon juice
(from 4 lemons)
4 large
eggs
1 cup 200 grams
sugar
½ teaspoon 3 grams
fine sea salt
⅛ teaspoon 0.25 gram
cayenne pepper
FAIRY CAKES
2 large
egg whites
5 tablespoons plus 2 teaspoons 24 grams
egg white powder
½ cup 75 grams
all-purpose flour
MAKE THE MICROWAVE LEMON CURD:
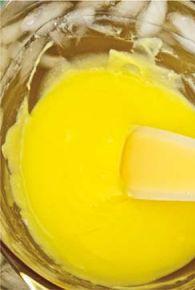
Put the butter in a small microwave- safe bowl and microwave on high for 45 seconds until the butter is melted but not hot. In a large microwave-safe bowl, whisk together the lemon juice, whole eggs, sugar, salt, and cayenne until smooth. Stir in the melted butter. Put the bowl in the microwave and cook for 1 minute on high power. Remove the bowl from the microwave and stir with a spatula. There may not be any visible change yet. Microwave for 1 minute more. Remove from the microwave and stir. The mixture will appear hot but will still look basically the same. Microwave on high for 1 minute more. Remove the bowl from the microwave—at this point the mixture will have thickened on the sides. Stir and then microwave for 1 minute more, for a total of 4 minutes. Remove the bowl from the microwave. At first glance the mixture will look semi-scrambled. Stir and it will become smooth, shiny, and thick. Put the bowl of lemon curd in an ice water bath. When the lemon curd has chilled, use it immediately or refrigerate it in a covered container for up to 3 days.
MAKE THE FAIRY CAKES:
Put the lemon curd and egg whites in a blender. Turn the blender on to low and increase the speed to medium-high. When the mixture is loose, sprinkle in the egg white powder and flour. Puree the mixture for 30 seconds until the egg white powder and flour are fully absorbed and the mixture is smooth.
Transfer the batter into the 1-liter canister of an iSi whipped cream dispenser and put the lid on. Charge with one N
2
O charger and then shake to distribute the gas and allow it to be absorbed into the batter. Repeat with a second charger. The batter should feel and sound fluid in the canister. The batter may be used immediately or stored in the canister in the refrigerator for up to 24 hours. Shake vigorously before using.
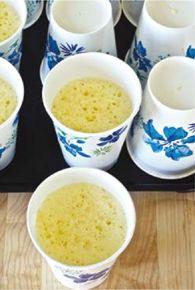
Prepare twelve 10-ounce paper cups by turning them over and using a paring knife to make a small slit in the bottom of each cup and 3 small slits around the sides to let steam vent as the cakes cook. Turn the cups right side up and set them on the counter. Shake the whipped cream canister and dispense batter into a cup, filling it one-third of the way up. Put the cup into the microwave and cook on high for 30 seconds. Immediately remove it from the microwave and invert the cup (with the cake still in it) onto a cutting board or countertop. Let the cake cool in this position while cooking the remaining cakes. Repeat the process of filling the cups and cooking the cakes until you’ve used all 12 cups. Let the lemon cakes cool until the cups are no longer hot to the touch.
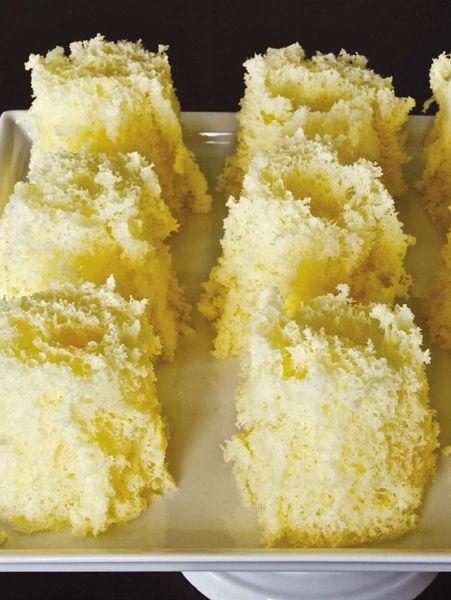
To serve, run a paring knife around the inside of the cups to loosen the cakes. Gently shake each cup to remove the cake; they will have a honeycombed appearance like small sponges. Alternatively, the cakes may be stored in the cups, inverted in the refrigerator, overnight.

CHILLING THE LEMON CURD


CARAMEL CAKE
CARAMEL CAKE IS A CLASSIC SOUTHERN CAKE THAT OFTEN
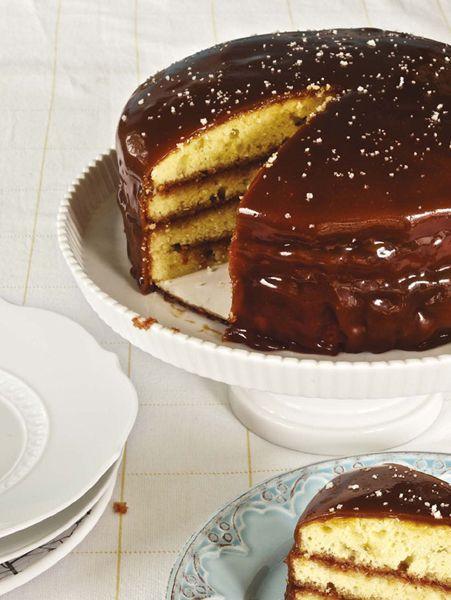
sounds better than it actually tastes. Part of the issue is that caramel is so sweet that you need to find a way to balance it in order to truly enjoy the flavor; oftentimes the combination of sweet cake and sweet glaze is just too much. We came up with the idea of using a bit of extra lactic acid—the acid found in dairy products—in the form of buttermilk powder in the cake batter to make it sharp enough to stand up to the caramel glaze. A bit of strawberry jam between the layers adds a different kind of acidity and brightness, leaving you with a cake that disappears almost as quickly as you can cut it. If you happen to be the kind of person who prefers frosting to a glaze, you can simply beat 1½ cups (170 grams) confectioners’ sugar into the lukewarm glaze and it will make a super-creamy frosting instead.
MAKES ONE 8-INCH / 20 CM LAYER CAKE
CAKE
8 ounces 225 grams
unsalted butter,
at room temperature
1¾ cups 350 grams
sugar
1 tablespoon 9 grams
buttermilk powder
1 tablespoon 18 grams
baking powder
1 teaspoon 6 grams
fine sea salt
4 large
eggs,
at room temperature
1¼ cups 300 grams
cultured buttermilk
,
homemade or store-bought, at room temperature
1 teaspoon 4 grams
vanilla extract
3 cups 450 grams
all-purpose flour
CARAMEL GLAZE
2¼ cups packed 450 grams
light brown sugar
½ teaspoon 3 grams
fine sea salt
1 cup 240 grams
heavy cream
2 tablespoons 28 grams
unsalted butter
¼ cup 85 grams
Strawberry Jam
or store-bought jelly
Fleur de sel
MAKE THE CAKE:
Preheat the oven to 350°F (175°C). Butter and flour two 8-inch (20 cm) round cake pans.
In a stand mixer fitted with the paddle attachment, beat the butter, sugar, buttermilk powder, baking powder, and salt until light and fluffy. With the mixer running on medium-low, add the eggs one at a time, mixing until each egg is fully absorbed before adding the next.
In a small bowl, stir together the buttermilk and vanilla. Add one-third of the flour to the mixer, and when it is almost absorbed, add half of the buttermilk mixture. When the buttermilk is almost absorbed, add the next third of the flour, followed by the remaining buttermilk mixture and last third of flour. Divide the batter evenly between the prepared cake pans and rap them on the counter a few times to release any air bubbles.
Bake until the cakes are just firm to the touch or the internal temperature registers 190–195°F (87–90°C), 20 to 25 minutes. Let them cool in the pans for 10 minutes and then turn them out onto a wire rack to cool completely.
Once the cake layers are cool, use a large serrated knife to trim one of the tops so that it is perfectly flat. Save the cake trimmings so that you can dehydrate them and use them for other
recipes
. (You can wrap the cake layers in plastic wrap and refrigerate them for up to 24 hours before finishing the cake.) Cut each layer in half, creating four layers.
MEANWHILE, MAKE THE CARAMEL GLAZE:
In a deep, medium saucepan, combine the brown sugar, salt, and cream and set over medium heat, stirring to dissolve the sugar and salt. Cook the mixture, without stirring, until it reaches 240°F (116°C) on a candy thermometer. Remove the pan from the heat and stir in the butter; this will cause the caramel to bubble up. Once the caramel has stopped bubbling, stir it until smooth, then let it cool. Once the caramel has cooled to where it is thick but still liquid, you can use it to glaze the cake.
