Help Me! Guide to iPhone 6: Step-by-Step User Guide for the iPhone 6 and iPhone 6 Plus (13 page)
Read Help Me! Guide to iPhone 6: Step-by-Step User Guide for the iPhone 6 and iPhone 6 Plus Online
Authors: Charles Hughes
Tags: #Encyclopedias

A phone number sent via text message can be added to your Phonebook immediately. To add a texted phone number to your Phonebook:
1. Touch the icon on the Home screen. The Messages screen appears.
2. Touch a conversation. The Conversation screen appears.
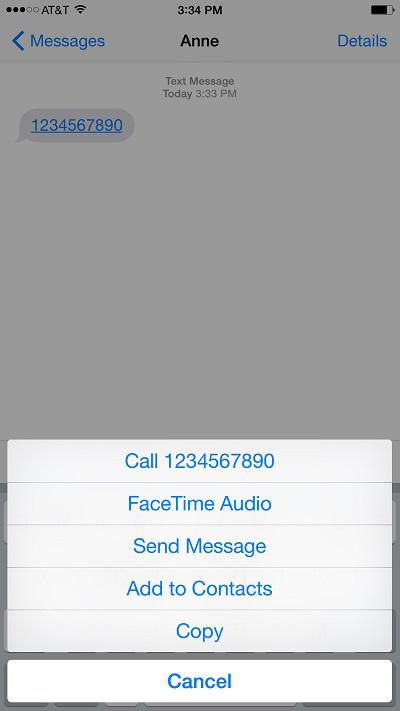
3. Touch and hold the phone number in the conversation. The Phone Number menu appears, as shown in
Figure 12
. On an iPad, the Phone Number menu appears above the phone number.
4. Touch
Add to Contacts
. The Info screen appears.
5. Touch
Create New Contact
or
Add to Existing Contact
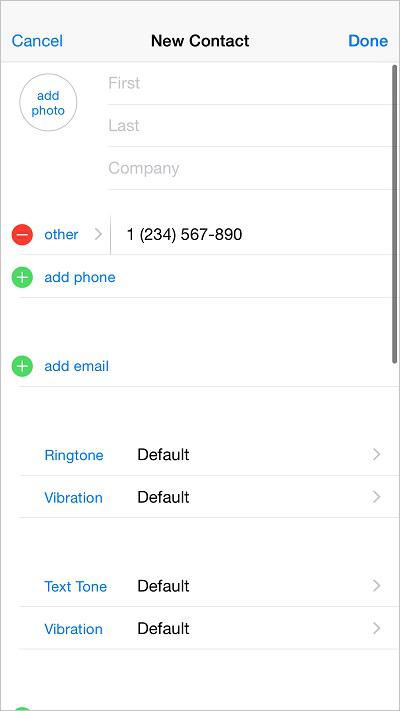
. If you touched 'Create New Contact', the New Contact screen appears, with the phone number field filled in, as shown in
Figure 13
. If you touched 'Add to Existing Contact' the Phonebook appears, allowing you to select a contact to whom you wish to attach the number.
6. Touch
First
and enter a first name. Touch
Last
and enter a last name. Touch
Done
at the top of the screen. The contact is added to your Phonebook.
 Figure 12: Phone Number Menu
 Figure 13: New Contact Screen
You may attach a picture to any text message that you send.
To send a picture message:
1. Touch the icon on the Home screen. The Messages screen appears.
2. Touch the icon. The New Message screen appears.
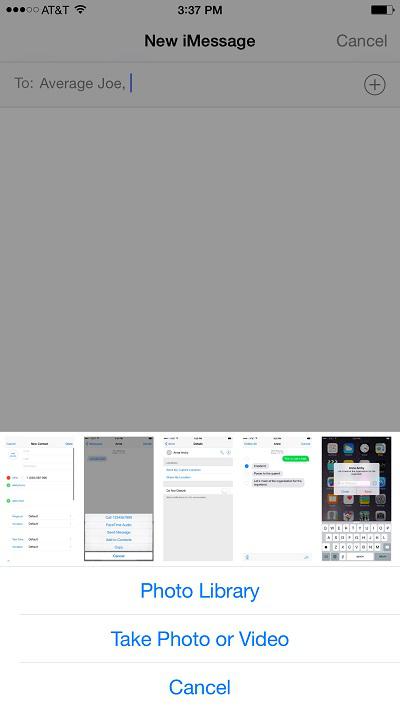
3. Touch the button to the left of the text field. The Photo Attachment menu appears, as shown in
Figure 14
.
4. Follow the steps in one of the sections below to either attach an existing picture or take a picture to send:
To attach an existing picture to the text message:
1. Touch
Photo Library
. A list of Photo Albums appears, as shown in
Figure 15
.
2. Touch a photo album. The photo album opens.
3. Touch a photo. The preview of the photo appears.
4. Touch
Choose
. The photo is attached to the text message. Alternatively, touch
Cancel
to select a different photo.
To take a picture and attach it to the text message:
1. Touch
Take Photo or Video
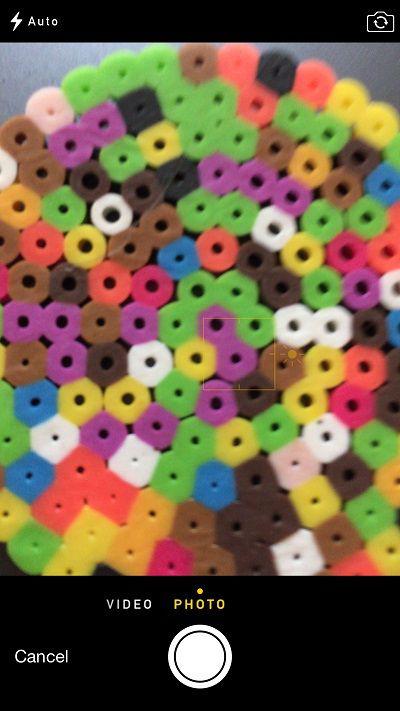
. The camera turns on, as shown in
Figure 16
.
2. Touch the button at the bottom of the screen. The photo is captured and a preview of the photo appears.
3. Touch
Use Photo
to use the photo in the message, or touch
Retake
to discard the picture and take another one. The photo is attached. Alternatively, touch
Cancel
while the camera is turned on to return to the conversation without taking a picture.
4. Touch
Send
. The picture message is sent.
N
ote: Up to nine photos may be sent in a picture message.
 Figure 14: Photo Attachment Menu
 Figure 15: List of Photo Albums
 Figure 16: Camera Turned On
You may remove yourself from a group conversation if you no longer wish to participate. Once removed, you will not receive any further messages in that conversation. To leave a group conversation:
1. Touch
Details
at the top of the conversation. The Conversation details appear.
2. Touch
Leave this Conversation
. A confirmation dialog appears.
3. Touch
Leave this Conversation
again. You are removed from the conversation.
Note: This feature may not be available on the iPad.
In order to find it more quickly and easily, you may name a conversation with a group. The title of the conversation will show up on the phone of everyone involved in the conversation. To name a conversation:
1. Touch
Details
in the upper right-hand corner of the conversation. The Conversation details appear.
2. Touch
Subject
. The virtual keyboard appears, and you may now enter a title.
3. Enter the title of the conversation. The conversation is renamed.
