OS X Mountain Lion Pocket Guide (9 page)
Read OS X Mountain Lion Pocket Guide Online
Authors: Chris Seibold
Tags: #COMPUTERS / Operating Systems / Macintosh

You’ll end up using the Finder for many basic tasks.
Want to rename a folder? Copy or move files? The Finder is your best
friend. Here are some tasks you’ll likely use the Finder for:
- Rename a file, folder, or drive
In the Finder, simply click the icon of whatever
you want to rename and then press Return. Mountain Lion
highlights the name so you can type a new one. Hit Return again
to make the new name stick.- Create a folder
To create a new folder, you can either choose
File
→
New Folder from the
Finder’s menu bar, or press Shift-⌘-N. The new folder appears as
a subfolder of whatever folder is currently selected. New
folders are creatively named “untitled folder.”- Quickly look inside a file
You can get a pop-up preview of a file’s contents
by using Quick Look. In the Finder, select a file, and then
press the space bar or ⌘-Y, or click the eye icon in your Finder
toolbar (if you don’t see this icon in the Finder’s toolbar, see
Customizing the Finder toolbar
to learn how
to add it). An easy-on-the-eyes window (like the one in
Figure 3-15
) pops up,
displaying the contents of the file.Quick Look is file savvy; look at a Word document and
you’ll see what’s written on the page, look at a spreadsheet and
you’ll see rows and columns, look at a movie and it will start
playing. All this without having to open the program associated
with that file.While Quick Look is visible, click a different file and
Quick Look displays that file instead. Switch Finder windows
(you can have a gazillion Finder windows open at a time) and
Quick Look displays the item in the current window. You can even
preview more than one file at a time with Quick Look: simply
select multiple files, and arrows will appear at the top of the
Quick Look window that you can use to flip through previews of
all the files you selected.
Figure 3-15. Dawn Mann edited this entire book using only Quick Look
and Messages- Make an alias
There are times you want access to a file or
folder without having to burrow through directories to get at
it. Some people’s first inclination is to move the item to a
more accessible location, but the best solution is to make an
alias. An alias acts just like the regular file or folder, but
it points to the original: put something in a folder alias and
it ends up in the original (target) folder. Delete the alias and
the item it refers to is unaffected.You can spot an alias by a
curved arrow in the lower-left corner of its icon. To create an
alias, select a file in the Finder and then choose File
→
Make Alias (or press ⌘-L). Then simply
drag the alias to where you want it.- Duplicate files and folders
If you want a copy of a file or folder, click the item in
the Finder and then select File
→
Duplicate (or press ⌘-D), and Mountain
Lion generates a brand-new copy of that item with the word
“copy” appended to its name. Your original item remains
untouched while you hack away at the copy.- Copy files to a new location on the same disk
When you drag files from one spot to another on
the same disk, OS X moves those files to the new location
without making a copy. To
copy
files to
another location on the same disk instead, hold Option while you
drag the files to the new location. Once you release the mouse
button, the original file(s) stay put, and you get a copy in the
destination location.Conversely, when you drag files from one disk to another,
OS X
copies
them. To make it move them
instead, hold down the ⌘ key while you drag.- Eject a drive or disk
If you’ve got external drives hooked to your Mac,
at some point you’ll want to eject them. Just yanking a drive
out is a bad idea; if data is still being written to the drive,
you might lose it.You have a few ways of ejecting drives and disks.
The classic way is to drag it to the Trash (when you do, the
Trash’s icon changes to an Eject icon). If you’ve got a Finder
window open, you can also eject it directly from the
sidebar—simply click the next to the drive’s icon. If a drive
won’t eject, Mountain Lion will tell you which application is
using files on that drive (and preventing you from ejecting
it).If you want to remount a drive (use the drive
after you’ve ejected it) that you left plugged in, you can
either remount it with Disk Utility
(
/Applications/Utilities/Disk Utility
) or
simply disconnect the drive from your Mac and then reconnect
it.- Reformat a disk
If you’ve got a new disk, it might not be in the
right format. Most flash drives and many pocket drives come
formatted as FAT32 disks, but some arrive unformatted. Your Mac
prefers the Mac OS Extended (Journaled) file system, and if you
don’t need to share files with another operating system (such as
Windows), this format is your best choice. To erase the drive
and format it as Mac OS Extended (Journaled), head to
/Applications/Utilities/Disk Utility
.
Select the disk you want to reformat from the list on the left
side of Disk Utility, click the Erase tab, select the format you
want, and then click Erase. Remember: reformatting erases all
the information on the disk.- Compress files and folders
If you’re going to burn a bunch of data to a disk
or if you want to minimize upload times, you can compress files
and folders. Mountain Lion gives you an easy way to pull this
off: right-click or Control-click a file, and then select
Compress from the pop-up menu, and Mountain Lion creates a copy
of that item with the same name, but with the suffix
.zip
appended. The amount of space
this saves depends on the type of file: compressing a QuickTime
movie (
.mov
) doesn’t save
as much space as compressing a folder full of text files does,
for example.
Duplicating Optical Disks
DVDs and CDs are getting less popular for sharing
files because of the availability of cheap flash drives, but they’re
still common enough that you might need to make backup copies of
important data stored on a CD or DVD. If you have a desktop Mac, you
could install two DVD drives and copy DVDs and CDs disk to disk, but
that option is available only on high-end Macs (although you could
use an external USB drive with other Macs). No worries, though; with
Disk Utility, you can easily duplicate that DVD or CD and burn it to
a different disk.
Fire up Disk Utility (
/Applications/Utilities/Disk
Utility
) and then select the CD or DVD you want to copy
from the list of available disks. Next, click the New Image button
at the top of the window, choose “DVD/CD master” from the Image
Format pop-up menu, and then choose a location with sufficient disk
space from the Where pop-up menu. Click Save and Mountain Lion makes
an image (a special type of copy) of the DVD.
Once the copying operation is complete, you’ll have a perfect
copy of the DVD or CD on your drive. To burn that copy onto a blank
CD or DVD, select the disk image from the list on the left side of
Disk Utility (if it’s not there, drag the disk image from the Finder
into the list), and then click the Burn button and insert a blank
disk when prompted. (Alas, this approach won’t work for
copy-protected software or movies.)
The Dock is a key aspect of OS X. It contains shortcuts to
frequently used applications, folders, and documents, and shows you
which applications are running by placing a blue dot under each one. (A
lot of people detest the blue dots; fortunately, you can turn them off:
just head to →
→
System
Preferences
→
Dock and then uncheck the
box next to “Show indicator lights for open applications.”)
Figure 3-16
shows a typical Dock.

Figure 3-16. A typical Dock
You can use the Dock to switch among active applications;
just click the Dock icon of the one you want to switch to, and that
becomes the frontmost application. When an application is starting up,
its Dock icon bounces so you can tell that it’s loading. If an
already-running application’s icon begins bouncing, that’s the Dock’s
way of telling you the application wants your attention.
The Finder is on the far left side of the Dock and is always
running. To the right of that, you’ll see application icons, a
dotted-line divider, the Applications stack, the Downloads folder, any
minimized windows, and the Trash.
If you upgraded from an older version of OS X, you’ll likely see
a Documents stack in your Dock as well. You may also find that what
appears as a stack and what appears as a folder differ from what’s
listed here. Don’t be alarmed: these differences won’t affect the way
your files are stored.
Since the Dock is conveniently located, it’s a natural way of
opening your most-used applications and documents. The obvious question
is how do you add items to the Dock? The process is simple: just locate
the application or document you want to add and then drag it onto the
Dock. Keep in mind, though, that you can put applications only on the
left side of the Dock’s divider and you can put documents only on the
right side of the divider. (Even if you haven’t placed an application or
a document in the Dock, it will appear there as long as it’s running or
open.) Adding items to the Dock doesn’t move or change the original
item, and removing items from the Dock doesn’t delete them from your
Mac.
To arrange items in the Dock, simply drag them into the order you
want. (Dragging a running application that’s not already in the Dock
permanently will add it.)
If you want to open a particular document in a specific
application, drag the file onto that application’s icon in the Finder
or Dock, and that application will generally try to open the file.
However, some applications respond differently: dragging something
onto the Mail icon, for example, attaches it to a new message.
Once your Dock is fully loaded with applications and documents, it
can get a little overwhelming. If you forget what that minimized window
is for or what application will start if you click a certain icon, the
Dock can help you out. Simply put your cursor over the Dock item in
question and a text bubble pops up with info about that item, as shown
in
Figure 3-17
.

Figure 3-17. Oh, so that icon represents the App Store...
Removing items from the Dock is easy: drag the unwanted
item off of the Dock or onto the Trash icon, or right-click or
Control-click the item in question and, in the pop-up menu that appears,
select “Remove from Dock.” (Remember, this removes the item only from
the Dock—the file remains on your Mac.
There are two things about the Dock that you can’t change: the
Finder is always on the left end of the Dock, and the Trash is always
on the right end. You can’t move them, and you can’t put anything on
the far sides of them. Think of the Finder and the Trash as two
bookends that expand to accommodate all the items in between.
Ever wanted to see all the windows an app currently has
open? You can accomplish that easily with Dock Exposé. The way you
pull this off is really slick: pick any running application, click and
hold its icon in the Dock, and then select Show All Windows in the
pop-up menu that appears. You then see something like
Figure 3-18
. Any minimized
windows show up as small versions below a subtle dividing line. Click
any window to bring it to the front.

Figure 3-18. Safari’s open and minimized windows displayed using Dock
Exposé
The pop-up menu that appears when you click and hold an
application’s Dock icon also lets you quit or hide the selected
application. The menu also includes an Options submenu to let you keep
the application in the Dock, set it to open each time you log into
your computer, or show it in the Finder.
Every item in the Dock has a Dock menu. To access this
menu, right-click or Control-click the item’s icon. What shows up in
the menu depends on what you click and, in the case of an application,
whether it’s running and what it’s doing. Application Dock menus
typically include relevant commands. For example, if you’re currently
playing a song, iTunes’s Dock menu lets you mute your computer, skip
and rate songs, and so forth. All applications’ Dock menus include
these options:
Options
→
Keep in Dock or
Remove from Dock, depending on current settingOptions
→
Open at Login (saves
you a trip to the Users & Groups preference pane)Options
→
Show in Finder
(reveals where the application resides on your Mac)Hide (hides all the application’s windows; equivalent to
pressing ⌘-H)Quit (closes the application; you’ll be warned if there are
any unsaved changes; equivalent to ⌘-Q)
The Dock menus for stacks (such as the Documents or Downloads
stack) offer a different set of choices:
Sort by options (Name, Date Added, Date Modified, Date
Created, Kind)Display as (Folder or Stack)
View content as (Fan, Grid, List, Automatic)
Options (“Remove from Dock” or “Show in Finder”)
Open [stack name]
That folder or jumble of icons (depending on how your
preferences are set—jumbled icons is the default) on the right side of
your Dock is called a
stack
. You can choose which view to
use for each stack by opening its Dock menu (the previous section
explains how). Here are your options:
- Fan View
This is the default view for stacks. If you click a stack
that’s set to this view, it’ll fan out, making it easy to choose
the item you’re looking for, as shown in
Figure 3-19
. Fan View is nice when there
aren’t a lot of items in a stack; it’s less helpful when there
are more than a dozen or so items. If you use the arrow keys to
select items in the stack, a blue highlight appears behind the
current item; hit Return to open it.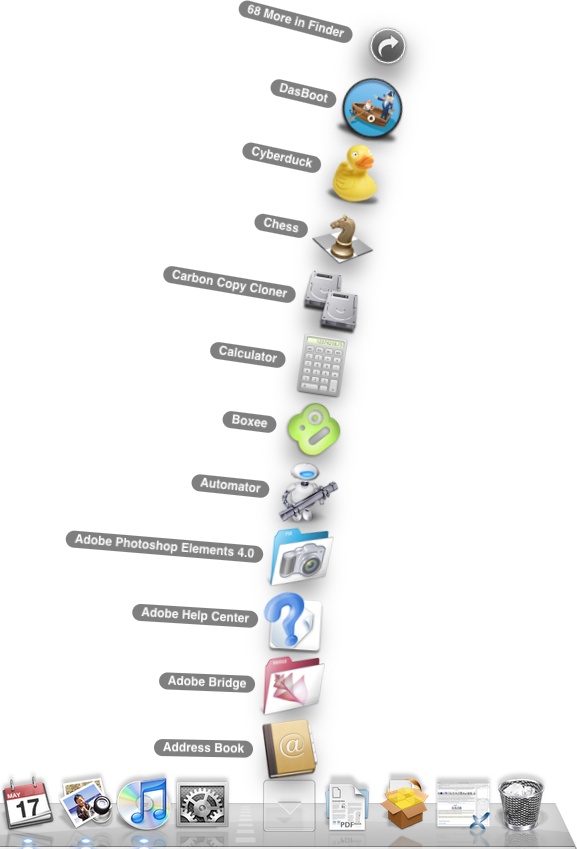
Figure 3-19. Fan View of a stack
- Grid View
In Grid View (
Figure 3-20
), you get to browse by icon,
and you can use the arrow keys to highlight an item. If that
item is an application or a document, hitting the Return key
starts the application or opens the document. If the selected
item is a folder, hitting Return opens
another
Grid View window that displays the
folder’s contents.
Figure 3-20. The useful Grid View
- List View
List View (
Figure 3-21
) displays the
stack’s items as a list on the same background used by Grid
View. List View is a bit pedestrian compared list Fan View or
Grid View, but that doesn’t mean it’s useless. You can scroll
through the list using the ↑ and ↓ keys, and when you run across
a folder, pressing the
→
key
opens a submenu of the enclosed items.- Automatic View
If you don’t feel like fine-tuning the way a stack
is displayed, you can let Mountain Lion pick a view for you
based on the stack’s contents. Simply right-click or Control-click the stack and then
choose Automatic from the “View content as” section of the
pop-up menu.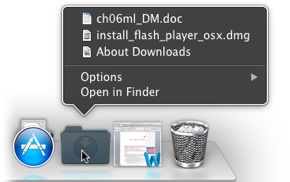
Figure 3-21. List View of the Downloads folder