OS X Mountain Lion Pocket Guide (11 page)
Read OS X Mountain Lion Pocket Guide Online
Authors: Chris Seibold
Tags: #COMPUTERS / Operating Systems / Macintosh

Some features of Mountain Lion are really useful but not strictly
required for day-to-day use. Spotlight is fantastic for searching your
Mac, but some folks never need to search because they have insanely good
organizational skills. Mission Control lets you see everything on your
desktop (and more) at the same time—a lifesaver for those who work with
multiple windows. If you’re interested in one or more of these features,
this is the place to look.
One of the big changes in Mountain Lion is that it gives
you the ability to share things easily and in multiple ways. Mountain
Lion accomplishes this by adding a feature called Share Sheets to most
applications. You access Share Sheets by clicking the Share button,
which doesn’t always look
exactly
the same (it
matches the app you’re using), but it resembles
Figure 3-28
.
When you see that icon, it means you can share whatever you’re
looking at with the world. Click the Share button and see your options
for spreading the word about your new favorite thing.
Figure 3-29
shows how you can
share an image from Photo Booth.

Figure 3-28. The Share button (and Trash icon) in Notes
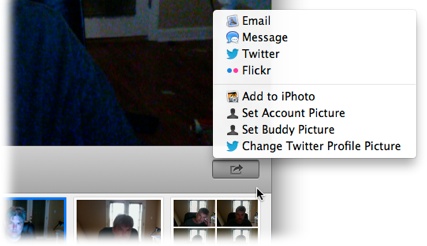
Figure 3-29. Photo Booth offers a ton of sharing options
Before you’ll get options to share on Twitter, you have
to sign into Twitter. Once Mountain Lion sees you accessing Twitter,
it’ll ask if you want it to remember your Twitter info. If you choose
Yes, the system will add Twitter to your Share Sheets (where
applicable).
The exact options you see on the Share Sheet depend on the app
you’re using: The ways you can share something from Notes are different
from the ways you can share something from Safari, for example. (See
Figure 3-30
.)
Even the information you can share differs depending on the share
methods you choose. If you decide to email a web page to some friends,
for example, the result will be an email message with the contents of
that web page; it will look something like
Figure 3-31
.
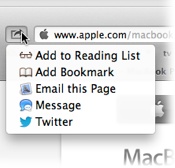
Figure 3-30. Sharing a web page from Safari
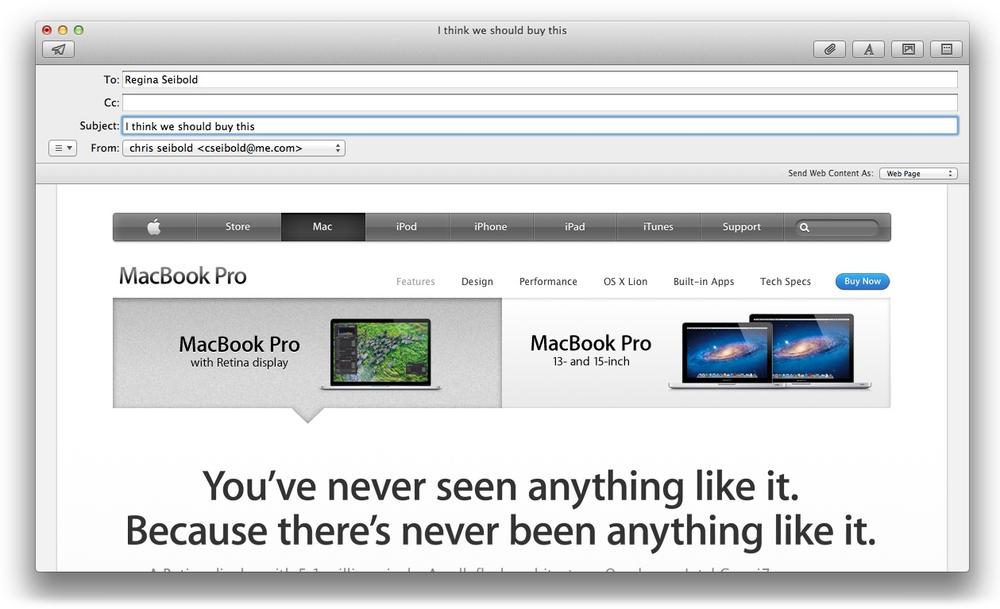
Figure 3-31. Sharing a subtle present suggestion
If you choose to share the same web page via Messages instead,
you’ll just send the link to the recipients. If you opt to send the page
to your followers using Twitter, you’ll send out something that looks
like
Figure 3-32
and have the option to add your
location.

Figure 3-32. Tweeting a link
Not every app can share, though. Apps included with Mountain Lion
that can share include Notes, Reminders, iPhoto, Photo Booth (you can
even change your Twitter picture directly from Photo Booth), Safari, and
FaceTime. And sharing isn’t limited to apps created by Apple—other
developers will be able to use the new sharing options built into
Mountain Lion, too. To figure out whether an app can share, just look
for the Share button.
Auto Save and Versions were introduced in Lion. Auto Save
does exactly what its name implies: as you work on a document, song,
movie, or whatever, Auto Save automatically saves your progress
incrementally so you don’t have to. Working in TextEdit and just want to
quit? You don’t need to save before quitting—Auto Save will save your work
without being told to.
Versions are the result of all those saves. With Versions,
if there’s a change you want to undo, you aren’t stuck with the most
recent version of your file. Use TextEdit as an example. Once you create a
document and start typing in it, the word “Edited” appears in the title
bar to let you know that Auto Save is working. Click Edited to reveal a
drop-down menu that gives you six options:
- Rename...
You can guess what this does: it lets you give the
document you’re working on a new name.- Move To...
Lets you choose where you want to save the document.
iCloud is an option, naturally.- Duplicate
Choosing this option lets you create a copy of the
current version of the file you’re working on and save it to a new
location.- Lock
This option lets you lock the document. Once it’s
locked, you won’t be able to edit it, but you can use it as a
template for a new document. Think of this as a way of being sure
you don’t make any boneheaded changes to something you worked long
and hard to create.- Last Saved
Choosing this item reverts to the last version you
explicitly saved with the Save command (not the latest version that
Auto Save created).- Browse All Versions
This is where Versions comes in. If you’ve made some
changes to your file that you like and some that you hate, you can
use Versions to pick out the moment in time when your file was at
its best. Select this option from the drop-down menu and you’ll see
a screen reminiscent of Time Machine. You can then flip through the
incremental changes Mountain Lion has been tracking and pick out the
version you like the most.
Not every application works with Auto Save, so don’t depend on
Auto Save to back up your work unless you’re
sure
the program you’re using supports it.
Auto Save and Versions work with iCloud as well, so if you’ve saved
your document to iCloud it is automatically updated on the cloud.
Using Spotlight is easy: Simply click the magnifying glass
icon in the upper-right corner of your screen and start typing the name
of the item you’re looking for.
In Snow Leopard, Spotlight lets you search through only the files
on your computer. But these days, it also lets you search the Web or
Wikipedia, as shown in
Figure 3-33
. (The results will
open with OS X’s Dictionary application.) You also get Quick Look
previews: just highlight the most promising-looking results and Quick
Look will give you a detailed look at the file or web page. Plus, you
can drag and drop things directly from Spotlight. Found that GarageBand
file you want to send to your pal? Drag it right to AirDrop to make the
process quick and painless.
When it’s searching your computer, Spotlight works by indexing
(making a list of) all the files on your Mac according to the files’
metadata and contents. So if you type “Lake Monsters Stole My Thursday”
into a document, that bit of data will be available to Spotlight. The
moment you type “lake monsters stole” into Spotlight’s search field,
you’ll see a list of matching files. By the time you’ve typed the entire
string into Spotlight, the document where you wrote it will be the top
result.
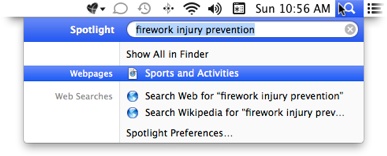
Figure 3-33. Choose where you want your results to come from
About Metadata
Metadata is information about a file. This includes
obvious things like the date it was created and its file type, as well
as a lot of unexpected info. An image’s metadata, for example,
contains information about its size, pixel count, and so on. Spotlight
is smart enough to realize that when you’re searching, you’re most
likely searching for a particular file’s name or contents, as opposed
to more esoteric metadata. So, while Spotlight indexes everything
(unless you tell it not to—see below), it puts results like documents
and folders higher on its lists of results than more obscure matches
(unless you change the order of its results—see below). That way, you
won’t be burdened by information overload when performing Spotlight
searches.
You can adjust how Spotlight arranges its results either
by choosing →
→
System
Preferences
→
Spotlight
→
Search Results or clicking Spotlight
Preferences at the bottom of any list of Spotlight search results. In
the window that appears, drag the categories into your preferred
order.
If you don’t want your Spotlight search results
cluttered with stuff you’re not interested in, go to→
System Preferences
→
Spotlight
→
Search Results and uncheck the boxes next to
any categories you find less than compelling. Be aware that not
returning results from certain categories doesn’t mean those files
aren’t indexed; read on to learn how to control
what
Spotlight indexes.
There are some things you just don’t want indexed: your
plans for world domination, your Pog value spreadsheet, and so forth.
To keep the things you want private out of Spotlight’s index, go to→
System
Preferences
→
Spotlight
→
Privacy. Clicking the + button brings up a
file-browsing window where you can select things you want to keep
Spotlight from indexing. You can exclude folders or entire disks.
Unfortunately, you can’t exclude a single file, so if you’re trying to
keep just one file out of the index, you either have to exclude the
folder it’s in (along with all of the folder’s other contents) or move
it into its own folder and exclude that.
As you learned above, Spotlight works by indexing
metadata. What if you want to add some metadata so Spotlight can find
files or folders with greater precision? The Info window is your key to
adding metadata (and changing other things, too). To open an item’s Info
window, select the item in the Finder and then either select File
→
Get Info or press ⌘-I. The window that appears
will look something like
Figure 3-34
.
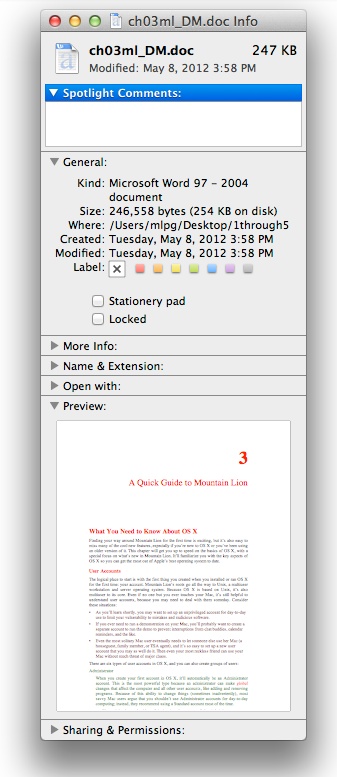
Figure 3-34. Get Info is a very useful window
This window has several subsections:
- Spotlight comments
Spotlight will index anything you type here and use it when
it searches.- General
This section includes pertinent data about the file
(if this section is collapsed, click the disclosure triangle next
to the word “General”). If you check the “Stationery pad” box
(which appears only when applicable), the file turns into a
read-only file, meaning you can look at it and save it as a new
file, but you can’t save it with the same name as the Stationery
pad; this effectively turns the file into a template. If you’re
constantly tweaking the same document, you can use the template
you created by checking the Stationery pad box as a starting
point. (For example, if you are constantly generating TPS reports
but you change only the last page, you can mark the document as a
Stationery pad. You can then open it and add what you need to
without worrying about corrupting the master file.) Checking the
Locked box locks the file. A locked file is much like a Stationery
Pad except you can’t easily throw it away. You’ll get warnings
when you move a locked file to the Trash and again when you go to
empty the Trash.- More Info
Clicking the More Info disclosure triangle reveals where the
file originated if it wasn’t created on your Mac. (The file shown
in
Figure 3-34
happens to
be the chapter you’re reading.)- Name & Extension
This section lets you rename the item and hide its
extension. You can also change the extension, but that will
(likely) change which program opens the file. If you change the
extension, you’ll get a warning from OS X.- Open with
This section is surprisingly powerful. You can
choose the application you want to open this particular file with,
or change what programs open any file with the same extension by
clicking Change All. Clicking the pop-up menu will reveal
suggested choices, but if you don’t want to trust OS X’s advice,
you can select Other to force a different application to open that
file.- Preview
This section shows the same preview of the file that you see
when using the Finder.- Sharing & Permissions
This is where you can fine-tune access to the file.
The options you’re first presented with differ depending on the
file, but generally include your account, an admin, and everyone.
Those are usually enough, but if you
really
want to control who can and can’t mess with a particular file,
click the + button to bring up even more options, as shown in
Figure 3-35
.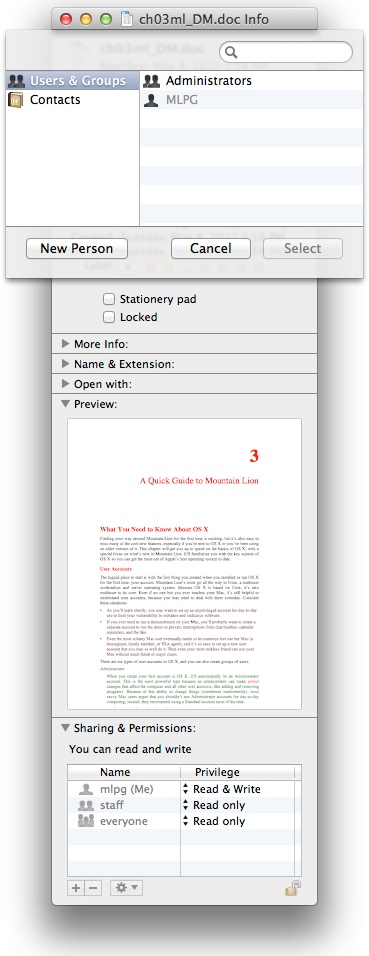
Figure 3-35. Fine-tuning who can share a file
In the window that appears, you can grant access to specific
individuals. Note that adding someone new (from your Address Book,
for instance) will bring up a dialog box where you can set a
password for the item, and will add a Sharing account to your Mac
for that person. Adding a new group of people will add a new Group
account.Finally, if you’ve made a bunch of changes to sharing and
then thought better of it, you can click the gear icon at the
bottom of the Info window and then undo what you’ve wrought by
selecting “Revert changes.”
The Sharing & Permissions section also includes a lock icon.
If you’re logged in as a Standard user, you can click it to unlock
restricted features, such as the Change All button in the “Open with”
section. However, you’ll need the username and password of an
administrative user to make those changes.