Mastering the Art of French Cooking, Volume 2 (33 page)
Read Mastering the Art of French Cooking, Volume 2 Online
Authors: Julia Child


When the final rise is complete, sprinkle pulverized cornmeal or pasta on the long side of the unmolding board and on the surface of the sliding board. Your object now is to unmold the loaves one at a time from the canvas to the sliding board, then to slide the 3 of them together onto the hot tiles in the oven. Place the long side of board at one side of the dough, |
|
Slip the dough, still upside down, from the unmolding board onto the right side of the sliding board. Line up the rest of the dough side by side in the same manner.
Slash the dough as described in
Step 9
.
Place pan of cold water on the lowest rack of an electric oven, or on the floor of a gas oven, add sizzling hot brick, and close oven door.
The 3 pieces of dough are now to be slid together off the sliding board onto the hot tiles in the oven: the movement is one quick, smooth jerk like that old magician’s trick of pulling the cloth from under a tableful of dishes. Open the oven and, holding the sliding board at the two ends nearest you, rapidly extend your arms so the far end of the board rests on the far end of the asbestos at the back of the oven. Then with one quick jerk, pull the board toward you and the three loaves will slide off onto the tiles. This must be a fast and confident action because if you pause midway, the dough will rumple off the board and once it touches the hot tiles you cannot move or reshape it, although it will come loose after 5 to 6 minutes of baking. You may muff this every once in a while, and produce some queerly deformed shapes, but they will all bake into bread.
Remove the brick and pan of water after 5 to 8 minutes of baking; the crust will have started to brown lightly. The oven should be dry for the rest of the baking. Total baking time will be about 25 minutes for
bâtards;
the bread is done when it makes a hollow thump if tapped, and when the crust is crisp and, hopefully, nicely browned.
SELF-CRITICISM—OR HOW TO IMPROVE THE PRODUCT
Certainly one of the fascinating aspects of cooking is that you can almost endlessly improve upon what you have done, and when you realize that professional bakers have spent years learning their trade it would be surprising indeed if your first loaves were perfect in every respect. If they seem below standard in any of the following points, here are some possible explanations.
Crust did not brown
If you have not used the hot brick and pan of water steam-contraption, you will not get a very brown crust. Or if you have used the brick, perhaps it was not really sizzling hot; heat it 15 minutes longer the next time, or use 2 bricks. On the other hand, your oven thermostat might be inaccurate, and the oven was not really at the required 450 degrees. A third possibility is that your dough might have been under-salted; check your measurements carefully in Step 1 the next time.
Crust was too brown or too red
If you were using the brick system, you might have had too much steam in the oven; next time use a smaller brick, or heat it a little less, or take it out several minutes sooner. Another possibility is that the dough mixture in Step 1 got an overdose of salt, and salt affects color; next time be sure your teaspoons are level.
Crust was tough
A tough crust is usually due to humidity: the day was damp and sticky, or your kitchen was steamy, and the starch has coagulated and hardened on the surface of the dough.
Slashes did not bulge open in the crust
Go over the instructions in Step 9 to check on whether you cut them as directed. On the other hand, it might be that the bread had over-risen in Step 7, just before baking, and the yeast had no strength left for its final push in the oven. Conversely, you might not have let it rise enough in this step and the dough was too heavy to bulge out the way it should.
Bread seems heavy; no holes inside
This is always due to insufficient rising, particularly during the pre-bake rise in Step 7. Next time be sure it feels light and springy, and looks swollen, and that it has risen to almost triple its original size before it goes into the oven.
Flavor is uninteresting
Again, the only reason for this is insufficient time taken for rising: the yeast has not had an opportunity to produce the slow aging and maturing that develops flavor. For your next batch, follow the timing and temperature requirements particularly in Step 3, for the first rise.
Flavor is unpleasantly yeasty or sour
A yeasty over-fermented smell and taste are due more often to the dough having risen at too high a temperature than to its having over-risen. Next time, watch the room temperature at which it is rising, and if you are making bread in hot weather, you will have to take a longer time and let it rise in the refrigerator.
MACHINE MIXING AND KNEADING OF FRENCH BREAD DOUGH
French bread dough is too soft to work in the electric food processor, but the heavy-duty mixer with dough hook, illustrated in the equipment section at the end of the book, works perfectly. The dough-hook attachment that comes with some hand-held electric mixers and the hand-cranking bread pails are slower and less efficient, to our mind, than hand kneading. In any case, when you are using electricity, follow the steps in the recipe as outlined, including the rests; do not over-knead, and for the heavy-duty mixer, do not go over a moderate speed of number 3 or 4, or you risk breaking down the gluten in the dough. When the kneading is finished, take the dough out of the bowl and give it a minute or so of hand kneading, just to be sure it is smooth and elastic throughout. Then proceed with the recipe as usual, from Step 3 on.

PAIN DE MIE
[White Sandwich Bread—for sandwiches, canapés, toast, and croûtons]

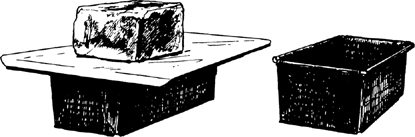
It is almost impossible in present-day America to find the firm, close-grained, evenly rectangular, unsliced type of white bread that is essential for professional-looking canapés, appetizers, and fancy sandwiches. In French this is
pain de mie
, meaning that the
mie
, the crumb or inside, is more important than the crust; in fact the crust exists merely as a thin and easily sliced covering. French
boulangeries
form and bake the bread in special covered molds; the bread rises during baking so that it fills the mold completely and emerges absolutely symmetrical. The form can be round or cylindrical, but it is usually rectangular. You can easily achieve the round or the rectangular shapes by baking in any straight-sided bread pan or baking dish, covering the pan with foil and a baking sheet, and topping that with some kind of weight to keep the bread from pushing up out of shape while it is in the oven.