DIY Projects for the Self-Sufficient Homeowner: 25 Ways to Build a Self-Reliant Lifestyle (7 page)
Authors: Betsy Matheson
Tags: #Non-Fiction

3 Assemble the sink drain system
completely before installing it as a unit. Here, an air admittance valve is being solvent-glued to a drain stub from the drain P-trap. You’ll need to run additional drain pipe to supply water to your reservoir. Contact a plumbing professional if you do not have experience with home plumbing.

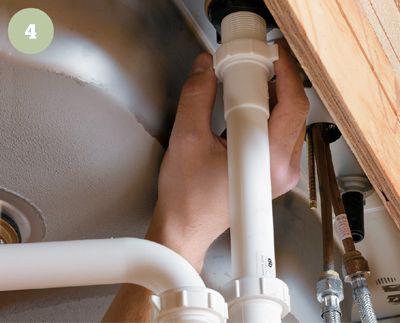
4 Hook up the drain assembly
to the tailpiece from the diverter sink. Run drain pipe to your water storage reservoir tank, making sure the tank is equipped with an overflow valve and tubing that leads into the main drain system.

The byproducts of yard maintenance and food preparation
accumulate rapidly. Everyday yardcare alone creates great heaps of grass clippings, trimmings, leaves, branches, and weeds. Add to this the potato peelings, coffee grounds, apple cores, and a host of organic kitchen leavings. The result is a large mass of organic matter that is far too valuable a resource to be simply dumped into the solid waste stream via curbside garbage collection. Yard waste and kitchen scraps can be recycled into compost and incorporated back into planters or garden beds as a nutrient-rich (and cost-free) soil amendment.

Composting turns yard waste
and kitchen scraps into a valuable soil amendment.
Managed Composting
With the right conditions, you can speed up Mother Nature’s course and yield several helpings of fresh compost for your yard each season. This is called managed composting, as opposed to passive composting, when you allow a pile of plant debris and such to decompose on its own. The conditions must be just right to manage compost and speed the process. You’ll need a balance of carbon and nitrogen, the right temperature, good air circulation, and the right amount of water. By mixing, chopping materials, and monitoring conditions in your compost pile, you’ll increase your yield each season.
Compost is nature’s own potting soil, and it effectively increases soil porosity, improves fertility, and stimulates healthy root development. Besides, making your own soil amendment through composting is much less expensive than buying commercial materials.
So how does garbage turn into plant food? The process works like this: Organisms such as bacteria, fungi, worms, and insects convert compost materials into humus, a loamy, nutrient-rich soil. Humus is the end goal of composting. Its production can take a couple of years if left undisturbed, or it can be sped up with some help from your pitchfork and a little livestock manure.
Although composting occurs throughout nature anywhere some organic matter hits the earth, in our yards and gardens it is always a good idea to contain the activity in a designated area, like a compost bin. Functionally, there are two basic kinds of bins: multi-compartment compost factories that require a fair amount of attention from you and hidden heaps where organic matter is discarded to rot at its own pace.
Both approaches are valid and both will produce usable compost. The main compost bin project seen on p. 28 is an example of the more passive style. At roughly one cubic yard in volume, it can handle most of your household organic waste and some garden waste. If you have a higher volume of organic waste or want to use a three-bin approach to staged composting, simply build additional bins.
 Compost Variables
Air:
The best microbes for decomposing plant materials are aerobic, meaning they need oxygen. Without air, aerobic microbes die and their anaerobic cousins take over. Anaerobic microbes thrive without oxygen and decompose materials by putrefaction, which is smelly and slow. Your goal is aerobic activity, which smells musty and loamy, like wet leaves. Improve air circulation in your compost bin by ensuring air passageways are never blocked. Intersperse layers of heavier ingredients (grass clippings, wet leaves) with lighter materials like straw, and turn the pile periodically with a garden fork or pitchfork to promote air circulation.
Water:
Compost should be as wet as a wrung-out sponge. A pile that’s too wet chokes out necessary air. A too-dry pile will compost too slowly. When adding water to a compost pile, wet in layers, first spraying the pile with a hose, then adding a layer of materials.
Temperature:
A fast-composting pile produces quite a bit of heat. On a cool morning, you might notice steam rising from the pile. This is a good sign. Track the temperature of your pile and you’ll know how well it’s progressing. Aim for a constant temperature between 140 and 150 degrees Fahrenheit, not to exceed 160 degrees. To warm up a cool pile, agitate it to increase air circulation and add nitrogen-dense materials like kitchen waste or grass clippings. A pile about three feet high and wide will insulate the middle of the pile and prevent heat from escaping. You’ll know the compost process is complete when the pile looks like dirt and is no longer generating extraordinary heat.

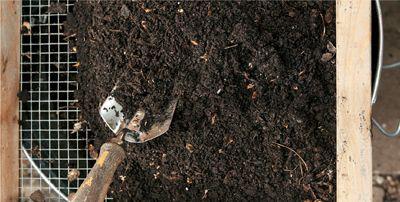
Called “black gold”
by home gardeners, compost can be generated on-site and added to any planting bed, lawn, or container for a multitude of benefits. Sifting the compost before you introduce it to your yard or garden is recommended.
 Browns and Greens
A fast-burning compost pile requires a healthy balance of “browns” and “greens.” Browns are high in carbon, which food energy microorganisms depend on to decompose the pile. Greens are high in nitrogen, which is a protein source for the multiplying microbes. A ratio of three-to-one brown-to-green materials is a good target.

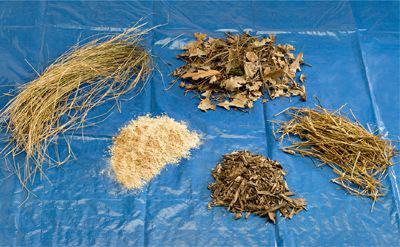
Browns:
Dry brown plant material, straw, dried brown weeds, wood chips, some saw dust (use with caution—avoid saw dust from chemically treated wood)

