B003YL4KS0 EBOK (14 page)
Authors: Lorraine Massey,Michele Bender

2
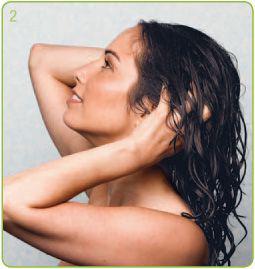
Cup one hand and apply a sulfate-free cleanser or botanical conditioner to the pads of your fingers. Evenly distribute the cleanser to the fingertips of
the other hand. Starting at the temples, use firm, circular motions of your fingertips to rub your scalp gently down the sides. Then move to the top of your head, massaging toward the crown. Finally, move down the back of your head, finishing up at the nape. (To make waves and s’waves look thicker, see
page 55
.)
3
Let the shower spray run through your hair, rinsing out whatever dirt and product build-up your fingers have loosened. Cup your hair in your hands as you rinse and squeeze upward at the same time so you hear a squishy sound.
4
Take a shallow palmful of botanical conditioner and apply it from the midsection of your hair to the ends. Applying it to the roots can make hair too limp. The only exception is if you tend to have a halo of flyaways at the roots. In that case, put a small amount of conditioner on your fingertips and graze it lightly over the canopy of the hair. Low frizz-factor wavy hair or baby-fine shorter hair may not always need conditioning after cleansing. It may make your hair too soft and reduce its body. Experiment with both methods. And if your hair feels well hydrated after cleansing, skip the conditioner and go to the styling section.

Apply conditioner beginning at the midsection of your hair.
5
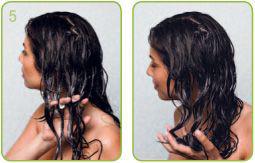
From the roots to the ends, comb conditioner through the hair with your fingers to smooth the cuticle and gather any loose hairs. Then take those same sections and scrunch upward. This opposite motion after combing will nurture and encourage your hair’s wave pattern.
6
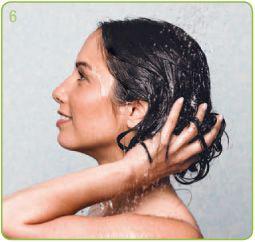
Cup your hair in your hands while standing under the water stream and rinse the hair thoroughly. Though other curl types leave some or all of their conditioner in the hair, wavy types should rinse it out completely so the weight of the conditioner doesn’t leave wavy strands flat.
1
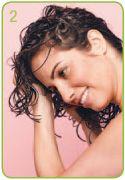
Lean over at the waist and tilt your head forward. Cup your hair loosely with a microfiber towel, paper towel, or an old cotton T-shirt and scrunch-squeeze as much water out of your hair as possible.

2
In the same tilted position, evenly distribute a shallow palmful of gel to both hands and coat your hair with the gel, using the scrunch-squeeze method.
3
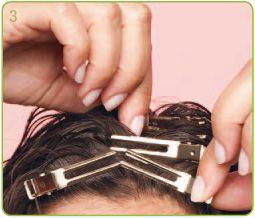
For a subtle lift at the crown, clip hair at the roots before diffusing it. (For clip tips, see
chapter 4
,
page 41
.) Clipping at the roots relieves the wet hair of its own weight as it dries. Add a little gel to the clip and leave it in until hair is completely dry.
4
Then you have three options for making waves. You may want to experiment to see which gives you the waves you crave, or use them at different times to achieve a variety of looks.
•
Bring your head upright and gently shake waves into their natural position and let them air dry. This is best for more defined waves rather than loose ones.
•
Keep your head tilted over and use a blow-dryer with a diffuser on a low to medium setting, or sit under a hooded dryer. Both are good techniques for wavy and s’wavy girls because it dries the hair faster and locks in the gel, helping the waves form with definition and hold. It also prevents the water and gel from weighing down the waves.
•
Place a yoga mat on the floor, and put a towel over it. Then lie down on the mat and spread your wet, gelled locks open on the floor around your head like a veil. Dry your hair with a diffuser set on low. Because the hair is resting on the floor, not being pulled down by gravity, its weightlessness guarantees body without frizz. A friend does this and her hair always looks full and amazingly defined.

For wavy and s’wavy curls, try drying your hair with a diffuser set on low to medium.
5
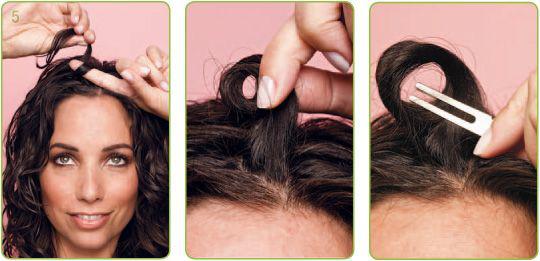
On dry or second-day hair, if you want a curlier look, try the pin curl method. Starting at the crown, wrap a section of hair around your finger, slide your finger out, hold the coil with your other hand, and insert a clip at a right angle. (The pin curls should stand out from your head, not lie flat.) Put all of your hair in giant pin curls. After the hair is dry, gently remove the clips by holding the hair with one hand and opening the clip with the other. Loosen your curls with your fingers.
6
Tilt your head forward and scrunch hair to loosen the gel cast (see
page 58
). Spritz hair with a spray gel for extra hold, if desired.
RE-FRESH-MENT FOR YOUR CURLSIt’s the end of a busy day and you’re heading for a night out. But you’re leaving in less than ten minutes and have no products or clips with you. Don’t disp-hair! Wet your hands in the sink, tilt your head forward, and scrunch upward, which should reactivate the gel that’s already in your hair. If you’re looking for more volume, shuffle your curls at the scalp (see
chapter 4
,
page 42
). If you have any dispersed curls, wet a finger, wind the curl around it, and hold it for a minute. Repeat this on any curls, as needed. You will be amazed at how quickly your hair can revive!
