Sew What! Bags: 18 Pattern-Free Projects You Can Customize to Fit Your Needs (34 page)
Read Sew What! Bags: 18 Pattern-Free Projects You Can Customize to Fit Your Needs Online
Authors: Lexie Barnes

1.
DECIDE YOUR SIZE
. For a good fit, base the size on your favorite kitchen apron, or measure your torso from hip to hip and add a couple of inches for seam allowance. For the height, measure from your waist (or hip, if you like to wear it low) down to anywhere you like. It’s your tool apron, so make it as long — or short — as you need it to be.
CUT YOUR FABRIC
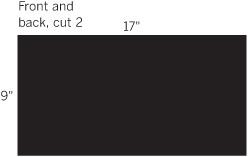
Figure out how big your pockets need to be before you finalize the size of the apron. Lay your tools out on your fabric and measure them. Be sure to allow for some ease (a little bit of extra room to get your objects in and out of the pockets). Keep your tools handy while you’re sewing and test along the way to make sure you’ve got a good fit.
2.
CUT YOUR FABRIC
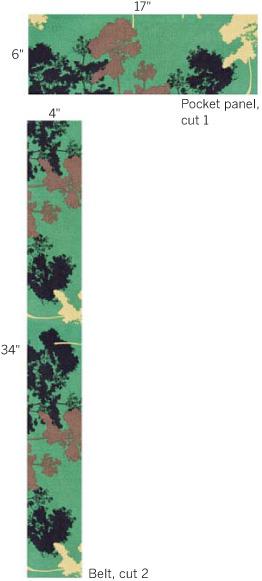
. Based on your measurements, cut:
primary fabric: one front and one back piece
Put It Together
3.
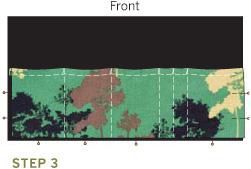
MAKE THE POCKET
. Press under the top edge of pocket panel ¼", then repeat for another ½". Edgestitch along the bottom fold. With right sides facing up, pin the pocket panel to front apron panel. Based on your measurements, stitch dividers for your pockets, backtacking at the top of the pocket panel. There’s no need to stitch the sides or bottom, as that will happen in the next step.
4.
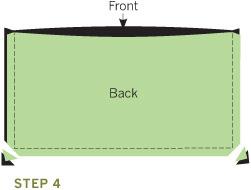
ASSEMBLE THE APRON
. Lay the back apron piece on top of the front piece, right sides together. Stitch the sides and bottom, leaving the top of the apron open. Clip the corners, trim the seam allowance, turn the apron right side out, and press. Fold under the top edge ½" to the inside, press, and topstitch.
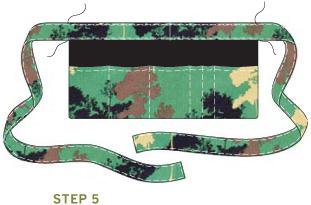
5.
MAKE AND ATTACH THE BELT
. With right sides facing, stitch the two belt pieces together to make one long strip. Press under the edges ½" on all sides, fold it in half lengthwise, and topstitch. (
See page
42
.) Center the belt on top of the apron, aligning the top edges of the belt and apron. Pin the belt in place and topstitch it to the apron along the length (following the stitching on both sides of the belt), backtacking at the ends.
SKILL LEVEL
pro
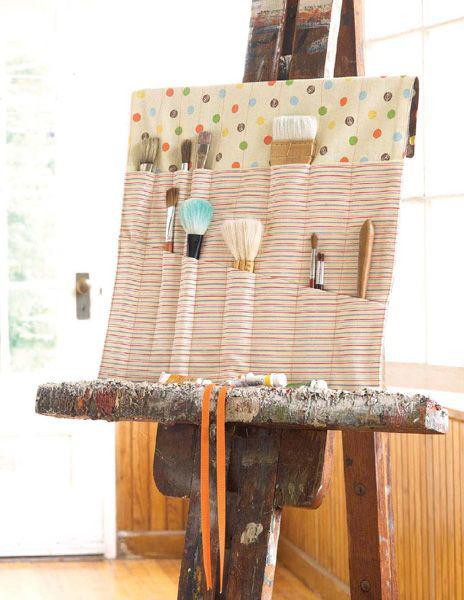
We made our roll for paintbrushes, but change the pocket configuration and you can store all kinds of tools, like knitting needles, carving tools, or pencils. You can add batting for extra protection, and combine fabrics to create your own look and feel. Pack up your tools your own way!
OUR FINISHED SIZE:
16" × 19" (open), 15½" × 6" (rolled)
WHAT YOU’LL NEED
(see page
18)
WHAT YOU’LL DO