The Contemporary Buttercream Bible (31 page)
Read The Contemporary Buttercream Bible Online
Authors: Christina Ong Valeri Valeriano

353
354
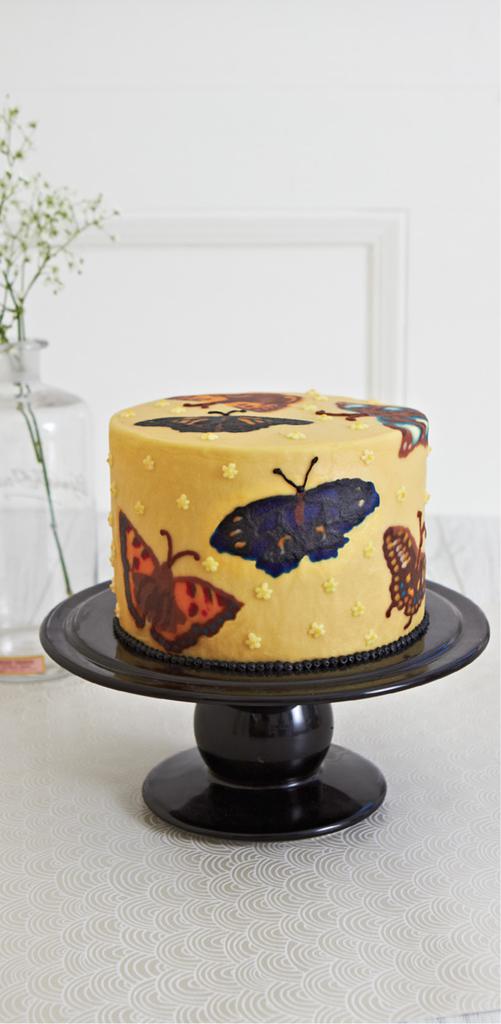
To create this cake…
• 15 × 13cm (6 × 5in) round cake
• 1.7–2.7kg (3lb 12oz–6lb) buttercream
• Paste colours: beige (Sugarflair Caramel), light
blue (Sugarflair Baby Blue), dark blue (Sugarflair
Navy Blue), orange (Sugarflair Tangerine), red
(Sugarflair Ruby), light brown (Sugarflair Dark
Brown), dark brown (Sugarflair Dark Brown), black
(Sugarflair Liquorice), yellow (Sugarflair Melon)
• Piping bags
• Palette knife
• Scraper
• Pen
• Ruler
• Scissors
• Greaseproof (wax) paper
• Sticky tape
• Printed patterns (see Templates)
• Baking sheet or any flat board
• Cocktail sticks (toothpicks) or headed pins
355
• Styrofoam dummy cake, to match size of cake
• Writing nozzles 1–3 (optional)
• Cake stand or covered cake board
Crumb coat (see Crumb Coating in Buttercream
Basics) and place the cake on a stand or covered
board. Use the Templates supplied to create your
curved frozen buttercream transfers by following
the tutorial. You will need to colour the buttercream in the following quantities: 800–900g (1lb
12oz–2lb) beige and 100–200g (31⁄2 –7oz) each of
light blue, dark blue, orange, red, light brown, dark brown, black and yellow. Leave the remaining
100–200g (31⁄2 –7oz) of buttercream uncoloured.
Apply the patterns to the cake and then cover the
cake with the beige buttercream, smoothing the
surface to a perfect finish (see Smoothing in
Buttercream Basics). Pipe tiny flowers with the
plain and yellow buttercream (see Dots in Piping
Textures and Patterns).
Troubleshooting
Using frozen buttercream transfers is not difficult,
but there are some pitfalls to avoid, and along the
356
way you might encounter some problems. Do not
worry – when we were experimenting we came
across them too, countless times. That is why we
thought we would show you some examples of what
might happen, remind you
not to panic,
and offer you our solutions.
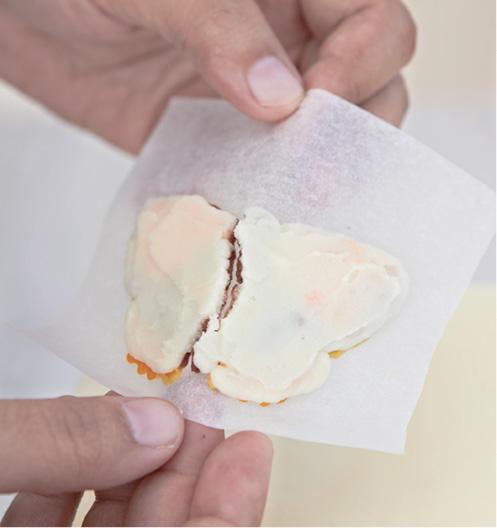
THE TRANSFER CRACKS
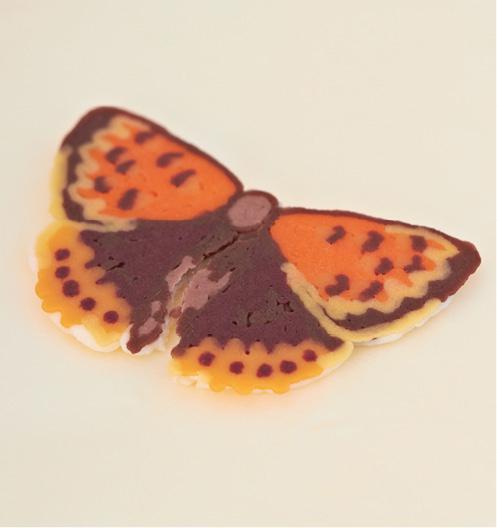
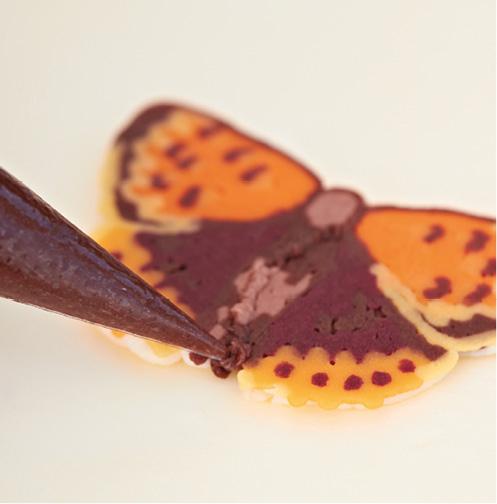
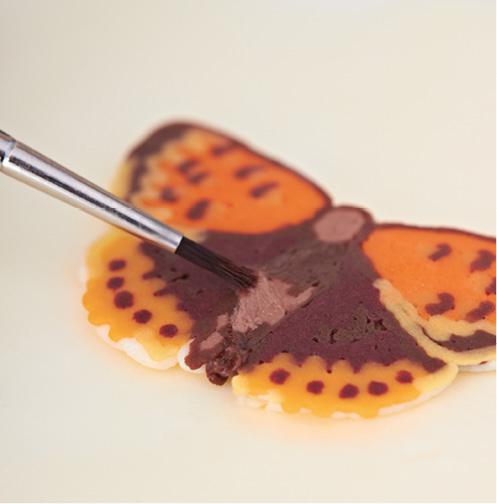
If your pattern cracks (A), position it on to your
cake anyway, putting the broken parts as close to
each other as possible (B). Where the crack is,
especially if there is a gap, pipe a small amount of
the same colour of buttercream over it (C) and use a
small paintbrush to blend colours together (D).
Then when crusted, smooth it (see Smoothing in
Buttercream Basics).
357
A
358
B
359
C
360
D
SOME DETAILS DON’T TRANSFER
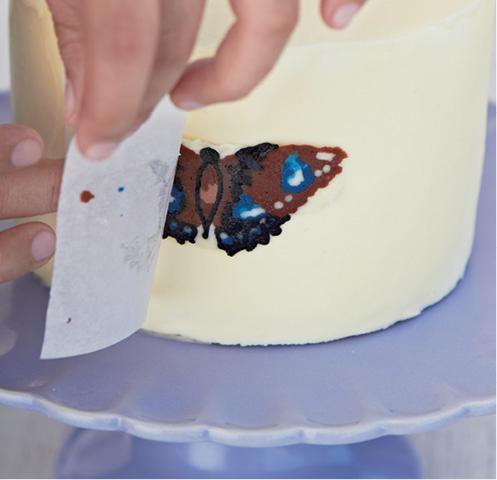
Most of the time, the reason this happens is that
your pattern is not sufficiently frozen and the
buttercream sticks to the greaseproof (wax) paper
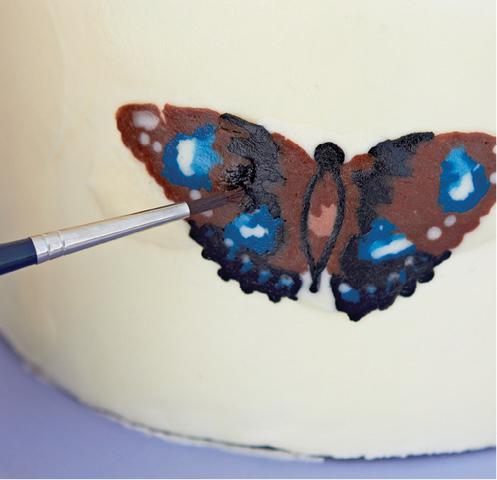
when you try to peel it off (A). If this happens,
simply pipe over the pattern again in the right
colours, then blend with a brush (B). Even if you
worry that you are a hopeless artist, you will be able to manage some small details. Just blending the
361
colours with a paintbrush usually does the trick. To
avoid this problem altogether, make sure that your
pattern is really frozen or apply a very thin layer of vegetable fat (shortening) to the surface of the
greaseproof (wax) paper before piping your design.
A
362
B
FORGETTING TO FLIP THE
IMAGE
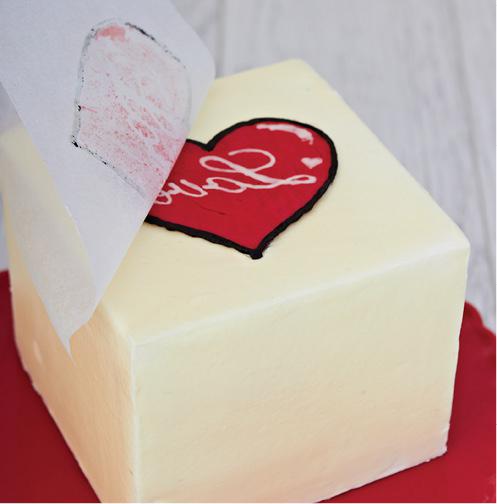
This problem is particularly bad if you are using
words, letters and numbers (A). The photograph
shows you what will happen if you forget to reverse
the picture to get a mirror image (B). If you’ve
already made the transfer before you spot your
mistake, there is nothing you can do but remove it,
or scrape it off, and re-do it again. You can print it out again or just trace your image on the
363
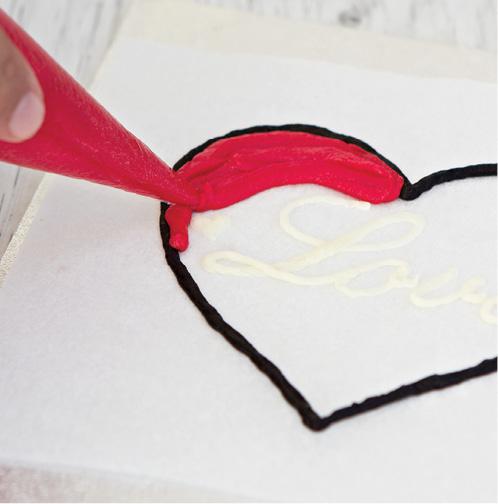
greaseproof (wax) paper and do the frozen
buttercream transfer on the reverse side of the
paper.
A
364
B
365
Stencilling
Stencilling is the process of recreating a design on
the surface of a cake using a ready-made stencil.
This is an extremely easy technique. The grandness
of your cake will rather depend on the stencil that
you use. Shop around, because there are some
really elegant ones that are widely available from
specialist and online retailers.
1 For a 15 × 15cm (6 × 6in) stencil, put about
300–400g (101⁄2–14oz) of tinted buttercream in a
bowl and add drops of water to ‘thin’ it into an
easily spreadable, but not runny, consistency (A).
Then put it in piping bag and snip off the tip to
create a small hole.
366
