Presentation Zen: Simple Ideas on Presentation Design and Delivery, 2nd Edition (Ira Katz's Library) (14 page)
Authors: Garr Reynolds

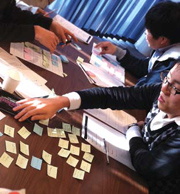
Brainstorming “off the grid” away from the computer. This is very much a nonlinear process, and the more ideas the better. Here ideas are suggested and quickly jotted down on Post-it notes.
Grouping and identifying the core.
In this step, I look to identify one key idea that is central (and memorable) from the point of view of the audience. What is the “it” that I want them to get? I use “chunking” to group similar ideas while looking for a unifying theme. The presentation may be organized into three parts, so first I look for the central theme that will be the thread running through the presentation. There is no rule that says your presentation should have three sections or three “acts.” However, three is a good number to aim for because it is a manageable constraint and generally provides a memorable structure. Regardless of how many sections I use, there is only one theme. It all comes back to supporting that key message. The supporting structure—the three parts—is there to back up the core message and the story.
Participants in a Presentation Zen seminar at the Kyoto Institute of Technology in Japan begin to group and identify core messages after their brainstorming session.
Storyboarding off the computer.
I take the Post-it notes roughly arranged in step 2 and lay them out in a sequence. The advantage of this method (compared to the Slide Sorter view in PowerPoint or the Light Table view in Keynote) is that I can easily add content by writing on an additional Post-it and sticking it under the appropriate section without ever losing sight of the structure and flow. In software, I have to switch to Slide mode to type or add an image directly on a slide and then go back to the Slide Sorter mode to see the big-picture structure. Alternatively—and this is very popular with my Japanese business students—you can print out blank slides, 12 slides per sheet, which essentially gives you a larger version of a Moleskine Storyboard. If you want larger slides, you can print out nine slides or six. You then can tape these to the wall or spread them out on the desk, keeping them in a notebook when you’re done. As shown below, you can sketch your visuals and write down your key points in a printed version of slideware notes.
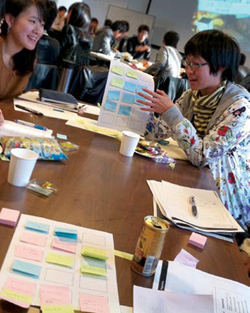
After eliminating many ideas created in their brainstorming session, these participants in Japan begin to build the structure of their presentation by arranging their messages in sequence. This part is still a bit messy as they are continuing to eliminate and add new ideas to improve their overall story.
Sketch your visuals.
Now that you have identified a clear theme, a core takeaway message, and two or three sections containing an appropriate amount of detail (including data, stories, quotes, facts, and so on), you can begin to think about visuals. How can you visualize your ideas to make them more memorable and accessible to your audience? Using a sketchbook and sticky notes, or even scratch paper, begin to change the words on your paper or sticky notes into rough sketches of images—images that eventually will become high-quality photography, quantitative displays, charts, slides featuring quotations, etc. You can use some of the same sticky notes to sketch the rough visualizations you used in step 3, and you can replace some of those notes with new sticky notes.
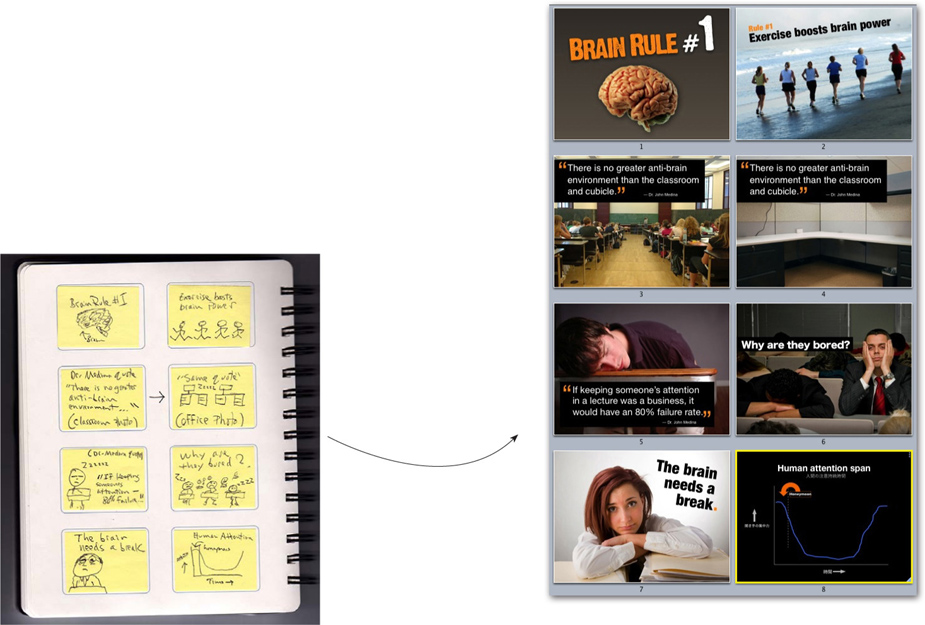
A sample of just eight slides from a section of a presentation on audience engagement, citing some of the ideas from the book
Brain Rules
by John Medina. I am not going to win an art competition for my quick sketches, but that does not matter. These rough sketches are just for me. (Image shown here is of the
Presentation Zen Storyboarding Sketchbook
(New Riders). Later, I used them to assemble simple visuals on the computer (opposite page).
You can also use your ideas generated in step 3 to create rough sketches in printed blank slides from your slideware. In this example, key points of the narration behind each visual are written on the side. These sketches became the slides on the right.

Shown here are the title slide, the “hook,” and the roadmap of the talk. The actual “hook” and background section of the obesity problem covered several slides before I introduced the roadmap/outline.
(Images used in these slides from iStockphoto.com.)
Storyboarding on the computer.
If you have a clear sense of your structure, you can skip steps 3 and 4 and start building the flow of your presentation directly in slideware (though I recommend going through those storyboarding and sketching steps if the stakes of the presentation are high). Create a blank slide using a template of your choosing (or the simplest version of your company’s template if you must use it). I usually choose a blank slide and then place a simple text box inside it with the size and font I’ll use most often. (You can create multiple master slides in PowerPoint and Keynote.) Then I duplicate several of these slides because they will contain the visual content of my presentation: short sentences or single words, images, quotes, charts and graphs, etc. The section slides—what presentation guru Jerry Weismann calls
bumper slides
—should be a different color with enough contrast that they stand out when you see them in the Slide Sorter view. You can have these
slides hidden, so you see them only when planning in Slide Sorter view if you prefer; however, in my case, these slides will serve to give visual closure to one section and open the next section.
Now that I have a simple structure in the Slide Sorter view, I can add visuals that support my narrative. I have an introduction in which I introduce the issue or “the pain” and introduce the core message. I then use the next three sections to support my assertions or “solve the pain” in a way that is interesting and informative but that never loses sight of the simple core message.
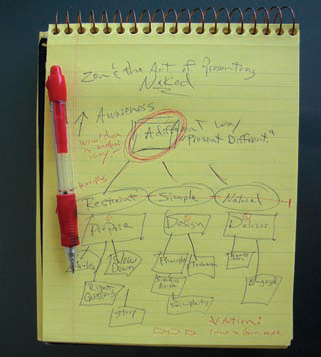
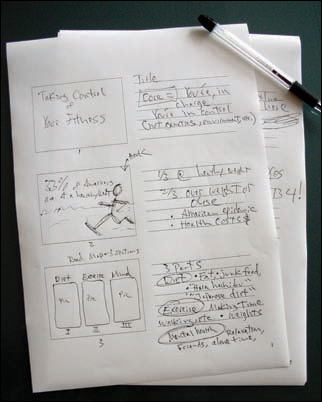
ABOVE
Rough outline from step 2 for a presentation I created on presentation delivery called “The Naked Presenter.” Here, I used a simple pad instead of Post-it notes. However, from the ideas on this pad, I sketched rough visuals and put down key words on Post-it notes to build the structure just as in step 4 (not shown here).

RIGHT
The start of the storyboarding process in step 5 for the same presentation. Although the sketches from step 4 are not shown here, from the outline structure from step 2, you can see the simple structure before slides were added to the appropriate sections. The total number of slides ended up being more than 200.
Nancy Duarte
CEO of Duarte, Inc., the world’s leading presentation and story firm. Clients include the greatest brands and thought leaders in the world.
www.duarte.com
Nancy Duarte talks about storyboards and the process of presentation design.

Much of our communication today exhibits the quality of intangibility. Services, software, causes, thought leadership, change management, company vision—they’re often more conceptual than concrete, more ephemeral than firm. And there’s nothing wrong with that. But we regularly struggle when communicating these types of ideas because they are essentially invisible. It’s difficult to share one’s vision when there’s nothing to see. Expressing these invisible ideas visually, so they feel tangible and actionable, is a bit of an art form, and the best place to start is not with the computer. A pencil and a sheet of paper will do nicely.
Why take this seemingly Luddite approach? Because presentation software was never intended to be a brainstorming or drawing tool. The applications are simply containers for ideas and assets, not the means to generate them. Too many of us have fallen into the trap of launching our presentation application to prepare our content. In reality, the best creative process requires stepping away from technology and relying on the same tools of expression we grew up with—pens and pencils. Quickly sketch lots of ideas. These can be words, diagrams, or scenes; they can be literal or metaphorical. The only requirement is that they express your underlying thoughts. The best thing about this process is that you don’t need to figure out how to use drawing tools or where to save the file. Everything you need you already have (and don’t say you can’t draw; you’re just out of practice). This means you can generate a large quantity of ideas in a relatively short amount of time.
For me, one idea per sticky note is preferable. And I use a Sharpie. The reason? If it takes more space than a Post-it and requires more detail than a Sharpie can provide, the idea is too complex. Simplicity is the essence of clear communication. Additionally, sticky notes make it easy to arrange and rearrange content until the structure and flow feels right. On the other hand, many people on my team use a more traditional storyboarding approach, preferring to linearly articulate detailed ideas. That’s fine, too. The point is not to prescribe exactly how to work but to encourage you to generate a lot of ideas.
Often ideas come immediately. That’s good, but avoid the potential pitfall of going with the first thing that comes to mind. Continue to sketch and force yourself to think through several more ideas. It takes discipline and tenacity—especially when it feels like you solved it on the first try. Explore words and word associations to generate several ideas. Use mind-mapping and word-storming techniques to create yet more ideas (digital natives might prefer mind-mapping software for this phase). Stronger solutions frequently appear after four or five ideas have percolated to the top. Continue generating ideas even if they seem to wander down unrelated paths; you never know what you might find, after all. Then, once you’ve generated
an enormous amount of ideas, identify a handful that meet the objective of the vision or concept you’re trying to communicate. It matters less what form they take at this point than that they get your message across.
By the way, cheesy metaphors are a cop-out. If you feel tempted to use a picture of two hands shaking in front of a globe, put the pencil down, step away from the desk, and think about taking a vacation or investigating aromatherapy. Push yourself to generate out-of-the-box ideas. Take the time and spend the creative energy because the payoff will be a presentation people not only remember, but one they take action on.
Now, begin to sketch pictures from the ideas. These sketches become visual triggers that spark more ideas. The sketching process should be loose and quick—doodles really. Generate as many pictures as you can. In this way, sketching serves as proof-of-concept because ideas that are too complex, time consuming, or costly will present themselves as ripe for elimination. Don’t worry about throwing things away—that’s why you generated a lot of ideas in the first place. In fact, you’re ultimately going to have to throw all of them away except for one (designers recognize this as the destructive aspect of the creative process; it’s a good thing). Some of the ideas you generate may require multiple scenes built across a few slides versus a snapshot on a single slide. On the other hand, sometimes it’s as simple as using the perfect picture or diagram. Focus on whatever works best, not on the idea that’s easiest to execute.
Be prepared to enlist the help of a designer. (You did plan far enough ahead to make sure you’ve got one available, right?) There’s no shame in seeking professional help; what’s important is effective communication, regardless of whether or not you have the skill set to execute it.
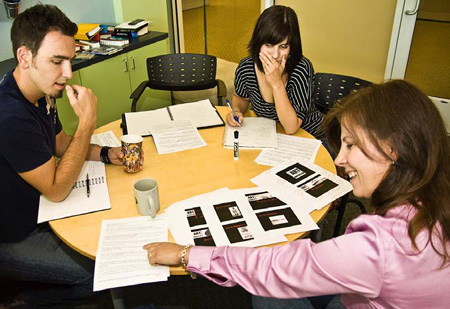
Brainstorming with Nancy Duarte (bottom right) and two of her staff, Ryan and Michaela, at Duarte headquarters in Silicon Valley.