iOS Programming: The Big Nerd Ranch Guide, 3/e (Big Nerd Ranch Guides) (38 page)
Read iOS Programming: The Big Nerd Ranch Guide, 3/e (Big Nerd Ranch Guides) Online
Authors: Aaron Hillegass,Joe Conway
Tags: #COM051370, #Big Nerd Ranch Guides, #iPhone / iPad Programming

You may have noticed that when you start typing the method definition for
init
in an implementation file,
Xcode
will automatically add an
init
implementation in your source file. If you haven’t noticed this, go ahead and type
init
in an implementation file and wait for the code-completion to kick in.
The freebie code comes from the
code snippet library
. You can see the code snippet library by opening the utilities area and selecting the icon in the library selector (
Figure 9.17
). Alternatively, you can use the shortcut Command-Control-Option-2, which reveals the utilities area and the
Code Snippet Library
. Substituting another number in the shortcut selects the corresponding library.
Figure 9.17 Code snippet library
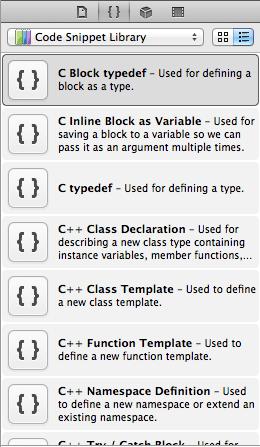
Notice that there are a number of code snippets available (
Figure 9.17
). Click on one, and in a moment, a window will appear with the details for that snippet. Click the
Edit
button on the code snippet detail window (
Figure 9.18
).
Figure 9.18 Snippet editing window
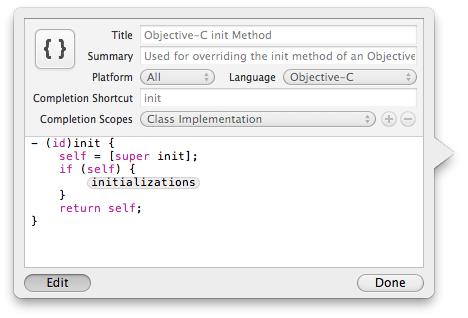
The
Completion Shortcut
field in the edit window shows you what to type in a source file to have
Xcode
add the snippet. This window also tells you that this snippet can be used in an Objective-C file as long as you are in the scope of a class implementation.
You can’t edit any of the pre-defined code snippets, but you can create your own. In
ItemsViewController.m
, locate the implementation of
tableView:numberOfRowsInSection:
. Highlight the entire method:
numberOfRowsInSection:(NSInteger)section
{
return [[[BNRItemStore sharedStore] allItems] count];
}
Drag this highlighted code into the code snippet library. The edit window will appear again, allowing you to fill out the details for this snippet.
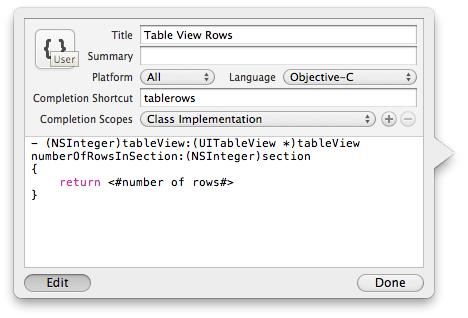
One issue with this snippet is that the return statement is really specific to this application – it would be much more useful if the value returned was a code completion placeholder that you could fill in easily. In the edit window, modify the code snippet so it looks like this:
numberOfRowsInSection:(NSInteger)section
{
return
<#number of rows#>
;
}
Then fill out the rest of the fields in the edit window as shown in
Figure 9.19
and click
Done
.
Figure 9.19 Creating a new snippet
Back in
ItemsViewController.m
, start typing
tablerows
.
Xcode
will recommend this code snippet and pressing the return key will automatically complete it for you – and the
number of rows
placeholder will be selected. You’ll have to type in the code to get the number of rows yourself. Snippets aren’t magical – just handy.
Before continuing, make sure to remove the code entered by the snippet because you have already defined
tableView:numberOfRowsInSection:
in
ItemsViewController.m
.
Have the
UITableView
display two sections – one for items worth more than $50 and one for the rest. Before you start this challenge, copy the folder containing the project and all of its source files in
Finder
. Then tackle the challenge in the copied project; you’ll need the original to build on in the coming chapters.
Make it so the last row of the
UITableView
always has the text
No more items!
. Make sure this row appears regardless of the number of items in the store (including 0 items).
Make each row’s height 60 points except for the last row from the medium challenge, which should remain 44 points. Then, change the font size of every row except the last to 20 points. Finally, make the background of the
UITableView
display an image. (This image should be 460x320 pixels or 920x640 pixels depending on whether your device supports retina display. Bonus points for appropriately handling both retina display and non-retina display devices correctly with the same application.)
Editing UITableView
In the last chapter, you created an application that displays a list of
BNRItem
instances in a
UITableView
. The next step for
Homepwner
is allowing the user to interact with the table – to add, delete, and move rows.
Figure 10.1
shows what
Homepwner
will look like by the end of this chapter.
Figure 10.1 Homepwner in editing mode
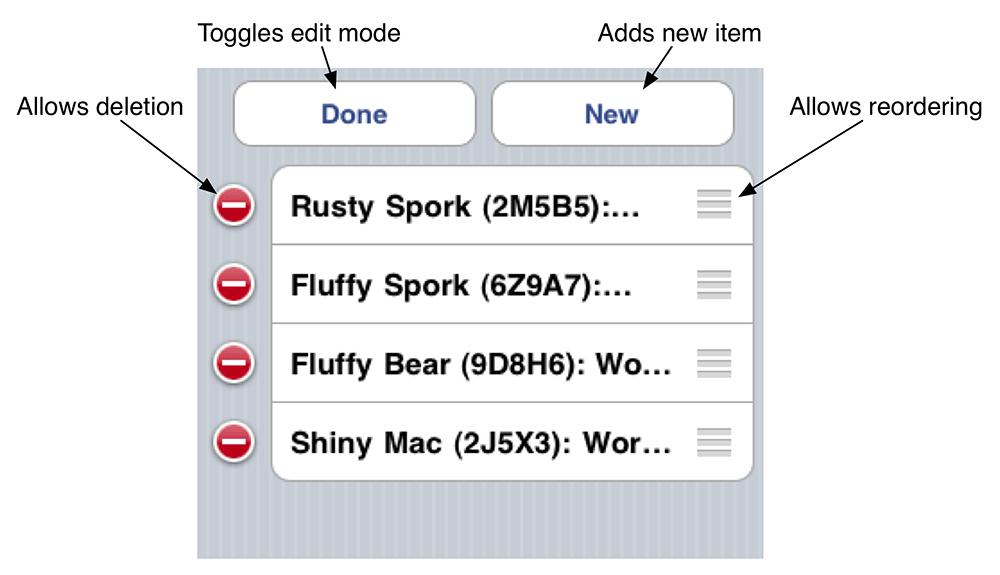
UITableView
has an
editing
property, and when this property is set to
YES
, the
UITableView
enters editing mode. Once the table view is in editing mode, the rows of the table can be manipulated by the user. The user can change the order of the rows, add rows, or remove rows. Editing mode does not allow the user to edit the
content
of a row.
But first, the user needs a way to put the
UITableView
in editing mode. For now, you’re going to include a button that toggles editing mode in the
header view
of the table. A header view appears at the top of a section of a table and is useful for adding section-wide or table-wide titles and controls. It can be any
UIView
instance. There’s also a footer view for the bottom of a section that works the same way.
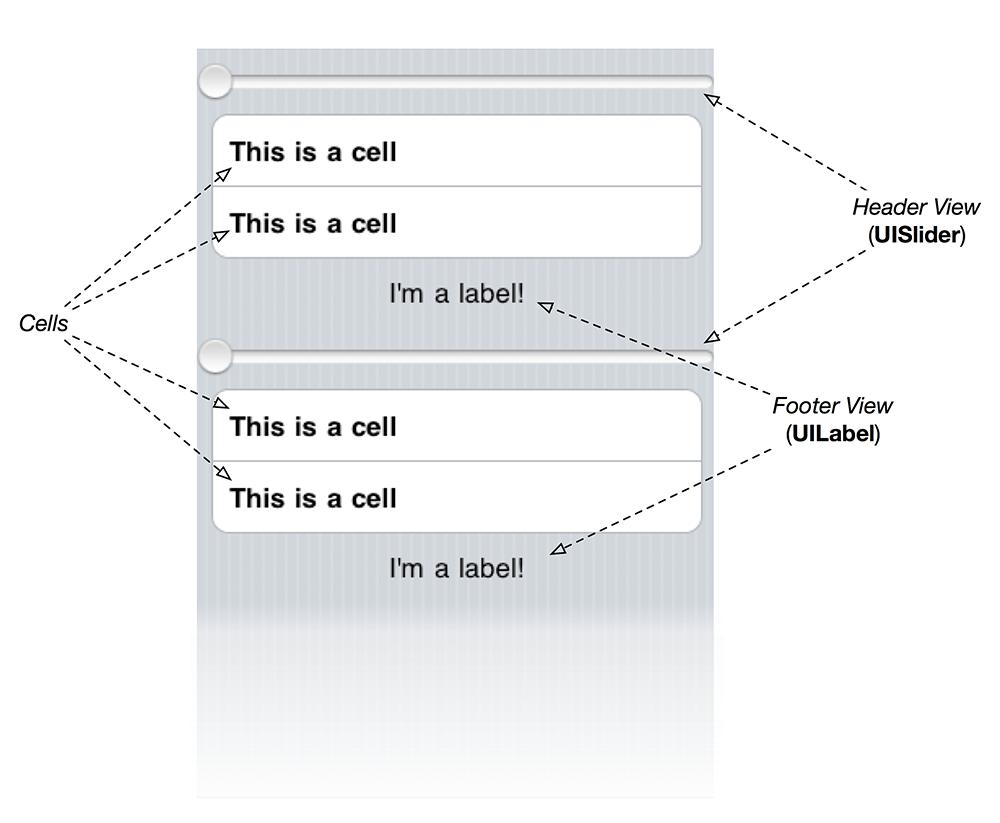
Figure 10.2
shows a table with two sections. Each section has a
UISlider
for a header view and a
UILabel
for a footer view.
Figure 10.2 UITableView header and footer views
The header view will appear at the top of the list of
BNRItem
s. It will have two subviews that are instances of
UIButton
: one to toggle editing mode and the other to add a new
BNRItem
to the table. You will create this view and its subviews in a XIB file, and
ItemsViewController
will unarchive that XIB file when it needs to display the header view.
First, let’s set up the necessary code. Reopen
Homepwner.xcodeproj
. In
ItemsViewController.h
, declare an instance variable of type
UIView
for your header view and three new methods.
{
IBOutlet UIView *headerView;
}
- (UIView *)headerView;
- (IBAction)addNewItem:(id)sender;
- (IBAction)toggleEditingMode:(id)sender;
@end
Notice that
headerView
is a strong reference. This is because it will be a top-level object in the XIB file.
Now we need to create the new XIB file. Unlike the previous XIB files you created, this XIB file won’t deal at all with the view controller’s
view
. (As a subclass of
UITableViewController
,
ItemsViewController
already knows how to create its
view
.) XIB files are typically used to create the view for a view controller, but they can also be used any time you want to layout view objects, archive them, and have them loaded at runtime.
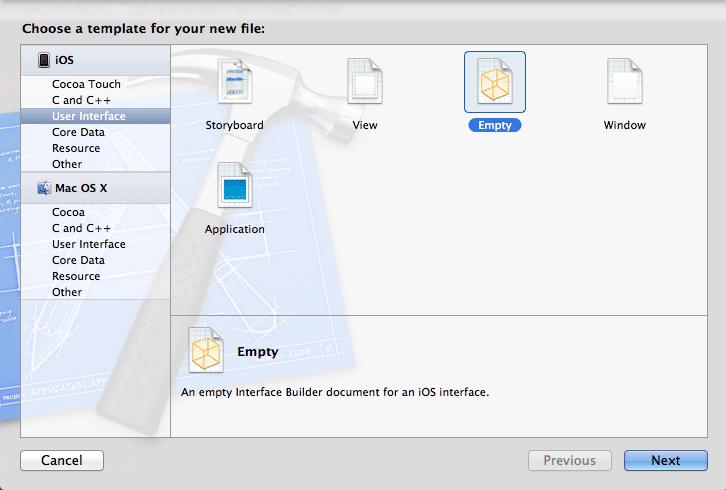
From the
File
menu, select
New
and then
New File...
. From the
iOS
section, select
User Interface
, choose the
Empty
template, and hit
Next
(
Figure 10.3
). On the next pane, select
iPhone
. Save this file as
HeaderView
.
Figure 10.3 Creating a new XIB file
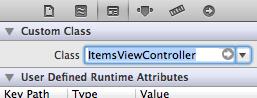
In
HeaderView.xib
, select the
File's Owner
object and change its
Class
to
ItemsViewController
in the identity inspector (
Figure 10.4
).
Figure 10.4 Changing the File's Owner
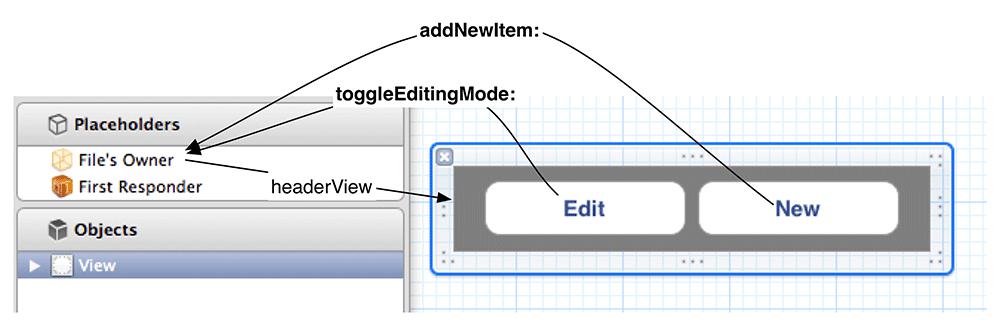
Drag a
UIView
onto the canvas. Then drag two instances of
UIButton
onto that view. Resize the
UIView
and make the connections shown in
Figure 10.5
.
Figure 10.5 HeaderView XIB layout
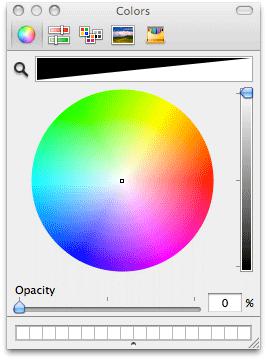
Also, change the background color of the
UIView
instance to be completely transparent. To do this, select the view and show the attributes inspector. Click the color picker labeled
Background
to show the color wheel and then drag the
Opacity
slider to 0 (
Figure 10.6
).
Figure 10.6 Setting background color to clear
So far, your XIB files have been loaded automatically by the implementation of
UIViewController
. For example,
TimeViewController
in
Chapter 7
knew how to load
TimeViewController.xib
because of code written in its superclass,
UIViewController
. For
HeaderView.xib
, you’re going to write the code to have the
ItemsViewController
load this XIB file manually.
To load a XIB file manually, you use
NSBundle
. This class is the interface between an application and the application bundle it lives in. When you want to access a file in the application bundle, you ask
NSBundle
for it. An instance of
NSBundle
is created when your application launches, and you can get a pointer to this instance by sending the message
mainBundle
to
NSBundle
.
Once you have a pointer to the main bundle object, you can ask it to load a XIB file. In
ItemsViewController.m
, implement
headerView
.
{
// If we haven't loaded the headerView yet...
if (!headerView) {
// Load HeaderView.xib
[[NSBundle mainBundle] loadNibNamed:@"HeaderView" owner:self options:nil];
}
return headerView;
}
You don’t have to specify the suffix of the file name;
NSBundle
will figure it out. Also, notice that you passed
self
as the owner of the XIB file. This places the instance of
ItemsViewController
in the
File's Owner
hole of the XIB file.
The first time the
headerView
message is sent to the
ItemsViewController
, it will load
HeaderView.xib
and keep a pointer to the view object in the instance variable
headerView
. The buttons in this view will send messages to the
ItemsViewController
when tapped.
Now that you’ve created
headerView
, you need to make it the header view of the table. This requires implementing two methods from the
UITableViewDelegate
protocol in
ItemsViewController.m
.
{
return [self headerView];
}
- (CGFloat)tableView:(UITableView *)tv heightForHeaderInSection:(NSInteger)sec
{
// The height of the header view should be determined from the height of the
// view in the XIB file
return [[self headerView] bounds].size.height;
}
These two methods are listed as optional in the protocol, but if you want a header view, you must implement both.
Now that these methods are implemented, the
UITableView
will send these messages to its
delegate
, the
ItemsViewController
, when it needs to show the header view. The first time
tableView:heightForHeaderInSection:
is sent to
ItemsViewController
, it will send itself the message
headerView
. At this time,
headerView
will be
nil
, which will cause
headerView
to be loaded from the XIB file.