Growing Your Own Vegetables: An Encyclopedia of Country Living Guide (11 page)
Read Growing Your Own Vegetables: An Encyclopedia of Country Living Guide Online
Authors: Carla Emery,Lorene Edwards Forkner
Tags: #General, #Gardening, #Vegetables, #Organic, #Regional

GROWING SWEET POTATO SLIPS
The sweet potato, like the white potato, is not grown from seed but is propagated from the root itself. The potato is a tuber with eyes that sprout, but the sweet potato is a true root with no eyes or buds. To produce sweet potato slips, about 5 to 6 weeks before garden planting time pot a sweet potato into a hotbed or container of soil at least 1 foot deep, burying the root halfway; smaller roots produce more slips. You can also lay the root in a pan of water to promote sprouting. Whichever method you choose, the temperature must be constantly warm, at least 75°F, and conditions moist.
When a sprout or slip is about 6 to 10 inches long and has produced roots, it’s time to carefully separate it from the original root. Hold the parent plant tightly with one hand and pull to remove the offspring with the other. For extra growing time, transplant slips to individual little pots or 2 to 3 inches apart in a hotbed with the base 2 to 3 inches deep. Plants can be set into the garden 2 weeks after the last frost date.
Other starchy roots
Cassava, kudzu, malanga, taro, and yams are all starchy tropical root crops that require lots of heat and moisture and a long growing season.
NONSTARCHY ROOTS
Beets
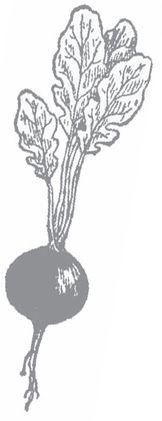
Beets (
Beta vulgaris
) are completely edible (all parts), delicious, and rich in nutrients, making them a valuable and efficient crop for the home garden. Beets generally appreciate a cool climate and have little tolerance for hot weather. Available in ruby red, golden yellow, pink, and even striped varieties, beets are beautiful plants with dark green glossy foliage that contribute an ornamental quality to the garden.
PLANTING:
Prepare a well-drained, loosened soil rich in organic material, working in compost or aged manure to increase the soil’s ability to retain moisture. In early spring, as soon as the ground is workable, plant seeds ½ inch deep and 1 inch apart in every direction. Each beet “seed” is actually a cluster of seeds; no matter how carefully you space the seed when planting, the young seedlings will need thinning as they emerge and begin to crowd each other. Harvest the thinnings, which are delicious fresh in salad or lightly steamed, gradually working toward an eventual spacing of at least 3 inches between mature beets. Beets may be successively sown every few weeks until a few months before the first expected killing frost. 50 to 65 days to maturity.
HARVESTING:
For “baby” beets, carefully dig when the roots are just 1 to 1½ inches in diameter. Mature beets should not be allowed to get larger than 3 inches in diameter or they may begin to turn woody and lose their sweet flavor. Beets that ripen in cool weather may be left in the ground, where they will hold for a long time provided they do not freeze. After harvest, remove beet greens, which may be prepared as you would chard, a close relative.
Carrots
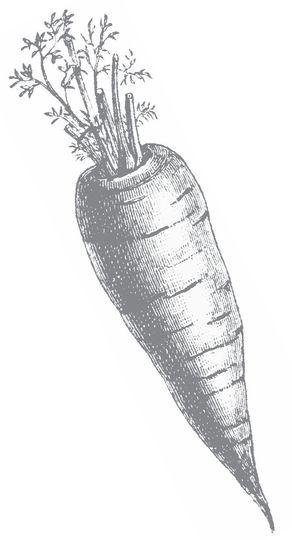
Carrots (
Daucus carota
) are easy, quick to grow and mature, productive in a limited space, cheerily colored, delicious, and nourishing. Carrot varieties range from short, round, and stubby to long, slender, and tapering roots and come in a rainbow of colors that include orange, yellow, purple, and even white. They prefer cool, wet weather and take about 2 months to mature—a bit longer for the larger varieties, which may grow up to a foot long.
Short-rooted carrots are the best choice if you have very rocky or shallowly cultivated soil, as long-rooted carrots that encounter obstacles will stunt, twist, and fork, making them difficult to harvest and to deal with in the kitchen. Do not plant in an area that has been recently manured or has high levels of nitrogen.

PLANTING:
Sow carrots in a deeply dug, finely prepared seedbed, beginning 25 days before your first frost-free date. In the South, plant in spring and fall to avoid midsummer heat. Carrot seed is fine, making it difficult to handle, and it can be slow to germinate. Sowing a mix of carrot and quick-to-sprout radish seed not only helps to mark the planting area but serves to thin and loosen the soil of the remaining carrot bed when the radishes are harvested. Keep the planting area moist throughout the growing period, and water well before thinning to prevent breakage. In areas of the country persistently plagued by carrot rust flies, sow sparsely to minimize the need for thinning. The flies, whose larvae burrow into the developing root and spoil the crop, are attracted to the carrot smell released by thinning and lay their eggs in the adjacent soil. 60 to 70 days to maturity.
HARVESTING:
Carrots may be harvested early for “baby” carrots. Carefully pull or fork to avoid breakage when harvesting the tender roots. In a well-drained soil they are not ruined by slight freezing and may be mulched and left in the garden in areas with mild winters.
Parsnips
Parsnips (
Pastinaca sativa
), a pale relative of the carrot, are just about the hardest-to-grow root vegetable, but worth the trouble because of their winter-keeping ability; parsnips can handle and even thrive on being left in the garden all winter, to be dug up as needed. Their long tapered roots are covered with a smooth, light-colored skin, and their flesh cooks up soft and sweet.
PLANTING:
The key to parsnip success lies in a well-prepared, rich soil; fresh seed (parsnip seed doesn’t keep well for more than a year); and a cool climate. Provide a deeply dug, well-drained, sandy soil to promote long straight roots. Unlike carrots, parsnips benefit from ample quantities of manure and fertilizer. Because they are even slower to germinate than carrots, it is recommended that you similarly sow radish seeds along with the parsnip seeds to mark the planting. Wait until the soil has warmed in spring to plant, as parsnips will be even slower to emerge in a cold soil. Sow the fine seed very shallowly, ½ inch apart, and cover with ¼ inch of soil; keep the soil well watered, as parsnips will not come up through a dry soil crust. Space rows 18 to 36 inches apart depending on your available space and soil fertility. Keep plantings free of weeds throughout the growing season. 110 to 120 days to maturity.
HARVESTING:
We’re accustomed to rushing sweet corn from garden to cooking pot because its abundant natural sugar starts changing to starch the minute it leaves the stalk. Parsnips reverse that process: they contain lots of starch that, when the plant freezes, changes to sugar! Parsnips will get sweeter and sweeter if left in the garden over the course of a frosty winter. Begin harvesting in October by digging, not pulling, the long skinny roots from the soil. In particularly cold areas, a protective mulch will allow you to dig parsnips even when the surrounding soil is frozen.
Radishes
Radishes (
Raphanus sativus
) are the vegetable that spring-starved gardeners, anxious to get their hands in the dirt, always plant. Easy to grow and fast—you might have the first ones to eat as soon as 3 weeks after planting. The most familiar radish grown in the United States is cherry-sized, with rosy skin and peppery-hot, white flesh. Larger white radishes are generally milder than red varieties, take longer to mature, and are planted in late summer for a cool-season harvest—thus they are sometimes referred to as “winter” radishes.
PLANTING:
Prepare a moisture-retentive seedbed that is not too rich. Red radishes do not require a deep soil; 6 inches is plenty, with seed sown ½ inch deep. Determine planting density by expected radish size, and thin seedlings to an eventual 2 inches apart in every direction. Because red radishes are quick to mature and do not tolerate summer heat, sow successively every 2 to 4 weeks, beginning in early spring. Plant later crops in the shade, water well, and mulch to keep cool.
Winter radishes must be planted to mature in cool weather for proper root development. Sow seed 8 weeks before the average date of your first fall frost, about 3 to 4 inches apart, and thin to accommodate spacing without crowding. If the season is dry, provide moisture to avoid tough, woody roots. 28 to 60 days to maturity depending on variety.
HARVESTING:
Red radishes are one of the quickest-growing vegetables but do not hold in the garden once they are mature. Tender and crisp in their prime, within a few days they quickly turn pithy and soft. Thin and harvest the largest roots first, leaving the others to size up.
Red radishes will store in the vegetable drawer of the fridge for up to a month.
Winter radishes will hold for up to 3 weeks in the garden once mature, after which time they begin to toughen. Thinnings may be used fresh like red radishes.
ASIAN RADISHES
Daikon
radishes are white and substantial—2 to 4 inches across by 6 to 20 inches long—with a mild peppery taste. They are a staple in Japanese cuisine, served fresh, pickled, cooked, and carved into elaborate garnishes. Sow seed 1 inch deep in late summer for a crisp harvest throughout the fall and into winter.
Sakurajima
is a large plant that needs as much room to grow as a tomato plant; its root can reach weights of 10, 20, or even 50 pounds. Extremely spicy, this variety is not eaten raw; cook as for turnips. Plant seeds 2 feet apart.
Lobak
, a Korean radish, is white with pale green shading at the base, wide as a potato, and 6 to 8 inches long. Its spicy flavor is good fresh or cooked and is a part of the Korean relish called kimchi.
Chinese black
radishes are long and slender like a daikon, with a black skin and white flesh; black Spanish radishes are globe-shaped. Both have a pungent flavor and may be prepared as for turnips or eaten fresh. Plant like daikon.
Rat-tail
radish is grown for its long seed pods—wide at one end, dwindling to a tip at the other, thus “rat-tailed”—which develop late in the season. Harvest the bean-like pods when they are young and tender. Moderately spicy, they can be prepared like snap peas or pickled.
Wasabi
is a very hot, green Japanese radish that is dried and powdered once harvested. Mix the powder with enough water to get a smooth paste and use sparingly.
Turnips and rutabagas
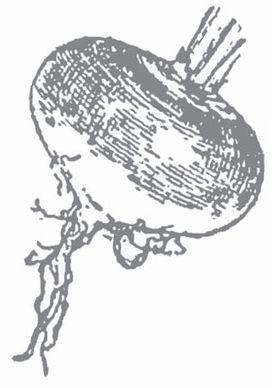
Turnips (
Brassica rapa
) are easy to grow and a good crop for high altitudes and chilly climates. In the South, turnips are an excellent cool-season vegetable, good for both the root and the nutritious greens.
The rutabaga (
Brassica napobrassica
), called Swede or Swedish turnip in England, is a cross between a turnip and a wild cabbage, first grown in the Middle Ages. Rutabagas thrive in cool climates and do well across the northern United States and even into the cooler parts of Canada. Grow them as you would turnips, although they get bigger and take about a month longer to mature.
PLANTING:
Like any root vegetable, turnips and rutabagas like a well-tilled, fertile soil. Both dislike hot weather. Turnips may be sown 1 month before the last spring frost date for an early crop or planted in July or August for a late crop. Turnips that are grown through a hot summer will be stringy and strong tasting. In the Deep South, plant in the fall for a winter harvest. 35 to 70 days to maturity depending on variety.
In mild climates rutabagas may be planted in early spring to mature in late summer. In hot summer areas plant in June to mid-July to mature in cool fall weather; hot weather during the later part of their growth causes big tops but small, tough roots. 90 days to maturity.


