Chinese Brush Painting (9 page)
Read Chinese Brush Painting Online
Authors: Caroline Self,Susan Self

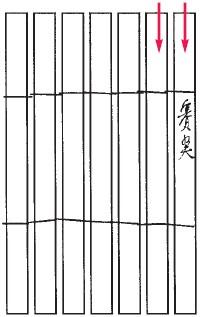
Writing from the top down and right to left on bamboo strips
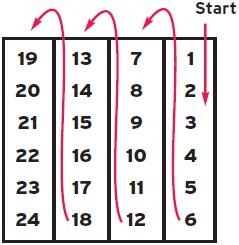
In the same way, the directions for making a character also start in the upper right corner and move down, then go to the top of the next column on the left and move down, and so on.
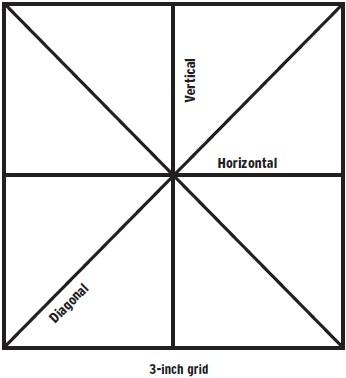
Preparing Grids
Beginners often use a grid to help them place the strokes for a character correctly. To make a grid, you need a piece of paper, a ruler, and a pencil.
1.
Using the ruler, make a square with each side 3 inches long.
2.
Using the ruler, draw two diagonal lines to connect the corners.
3.
Where these lines cross in the center, draw a vertical line up and down and a horizontal line across the box.
This grid will help you learn to place your calligraphy strokes. To get enough practice, you will need many copies of the grid. You can photocopy your hand-drawn page or use a computer to draw and print out multiple copies.
Writing Numbers
It’s fun to learn the numbers from one to ten in Chinese, plus a few other numbers. All these characters use combinations of the basic strokes. Practice each one several times, using the grid for help.
Number 1.
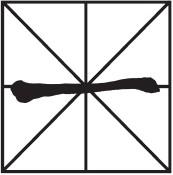
This character is just one bone stroke. Load the small brush with dark paint and hold your hand in position #1. Think about the bone stroke. It goes left and then right and then back left at the end. Notice where to place this stroke on the grid (across the horizontal line). Paint the stroke for number 1.
Number 2.
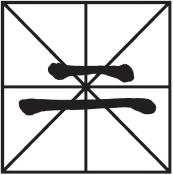
This character consists of two bone strokes. One is above the center horizontal line and shorter. The other is below the line and longer.
Number 3.
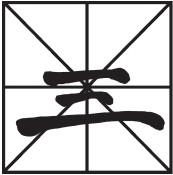
This character has three bone strokes. The top stroke is about where it was for number 2. The next stroke is short and below the center horizontal line. Paint these two strokes in. The last stroke is about the size of the character for number 1, but it is well below the center horizontal line.
Number 4.

Here, the bone strokes make a box. The secret is to twist the brush when you turn the top right corner to make a flat edge.
1.
Load the brush, start at the top left, press, lift, and drag to the right corner. Then roll the brush in your fingers to turn the corner and drag downward and stop. That is all one stroke.

2.
Go to the top left again and make a vertical bone stroke and stop at the bottom. You now have two strokes hanging down.
3.
Connect these with another bone stroke from left to right.
4.
In the center of the rectangle toward the left, make a dragged dot to the left of the center vertical line. Next to it, put an L-shaped stroke on the center line.
Number 5.
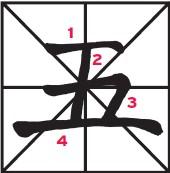
This character is made of more bone strokes. Notice that the center of the character is about in the center of the grid.
1.
Load the brush with dark paint and make a bone stroke between the two diagonal lines about half way up from the center horizontal line.
2.
Make a vertical line along the center vertical line down, ending about halfway to the bottom.
3.
The center stroke is similar to the corner stroke for number 4. It goes to the right across the center horizontal line, turns the corner, and moves down. Paint this stroke and stop half way down.
4.
Use the bone stroke to tie the verticals together. This is a long bone stroke in the middle of the bottom sections.
Number 6.
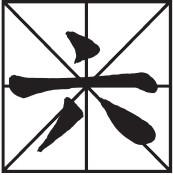
Notice that the bone stroke lies on the center horizontal line. Paint it with dark paint and your hand in position #1. The top dot lies on the center vertical line. The dragged dot on the left crosses the left diagonal line, while the long dot on the right lies on the right diagonal line.
